Concrete patios are a favorite for many homeowners because they’re both practical and durable; however, they can look dull, especially after a few years. That’s when many homeowners start looking for different ways to spice up the look and feel. You might be wondering: how can you cover up a concrete patio?
To cover up a concrete patio, your options are pavers, tiles, flagstones, carpets, or wood. Carpets are the easiest option, while pavers, flagstones, and tiles offer a more durable cover overall. Covering your dull concrete patio with any of these can improve your property’s aesthetic appeal.
The rest of this article will closely examine each of these options to help you make the right decision. Let’s talk more about how to cover up a bland concrete patio!

Table of Contents
Covering Up a Concrete Patio With Pavers
Even a newly installed concrete patio won’t surely improve the look of a property. The emphasis is usually on practicality more than anything else. Unfortunately, after installing a concrete patio, it goes downhill from there. Cracks, craters, and stains start to form, leaving the patio looking unkempt after a short time.
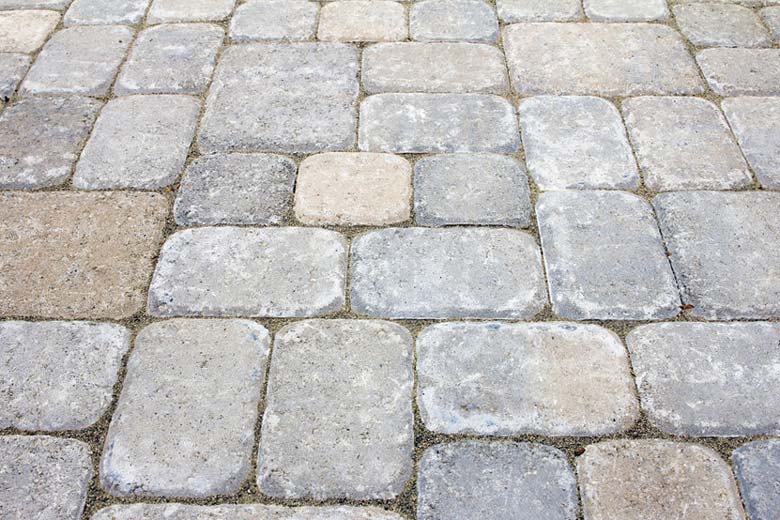
Concrete pavers can cover up a patio and make it look more attractive. Covering the patio with paver bricks is an excellent way to hide the aging or make the patio look better.
It’s also easier than laying paving stones from scratch or pouring new concrete. It doesn’t require too much time either, and you can get it done with average DIY skills.
Covering up your patio with pavers instead of going for a complete ground-up paver installation can save you a lot of money that would have gone to gravel. You also won’t have to spend the time and energy required to break up the concrete, dig up the soil, and haul everything away before pouring fresh gravel.
What You’ll Need
The tools and materials you’ll need are the following:
- Wheelbarrow
- Utility knife
- Tape measure
- Shovel
- Scrub brush
- Plate compactor
- Caulk gun
- Leather gloves
- Chalk line
- Concrete cleaner
- Sand
- Pavers
- Polyurethane adhesive for construction
- Screed pipe
- Landscape fabric
Expect to spend around $5 per sq ft. on this project using moderately priced pavers. If you choose to go with the cheapest pavers on the market, you can expect to reduce the costs by up to half. However, those may not always be the best for you to work with.
Spend some time at the home center to understand the pros and cons of each option and choose the right combination of pavers.
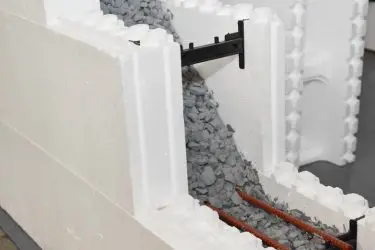
The pavers to use around the installation border have to be around 3-4in (7.62-10.16cm) thicker than those you use on the rest of the floor (the field). That way, you can pour a bed of sand easily under the field. Where thick pavers aren’t available, you can work the border with wall cap blocks.
To find out how much sand you’ll need for the project, calculate the square footage of the sand bed, and divide the number by 18 if the sand bed dimension is 3-4in (7.62-10.16cm). If it’s an inch, divide by 12 to get the quantity of sand you need in cubic feet. You can order a sand delivery, but you can save some money if you pick up the bags with your truck.
Here are the steps to take when you’re installing the pavers:
1. Evaluate the Concrete Slab for Chips & Flakes
Before covering up your patio with pavers, you need to ensure the slab is fit for the project. You can ignore damage on the surface, such as chips, craters, and flaking. However, there are a few problems that can make the installation problem more difficult.
- First, you need to ensure that your door threshold is high enough to accommodate border pavers. Don’t forget to account for an extra four inches for when the slab rises under freezing weather.
- Secondly, don’t cover up the ground with pavers if there are cracks that have consistently grown over the years. The crack can affect the pavers and lead to gaps in the future.
2. Clean the Area With Muriatic Acid in Water
You need to clean the corners of the patio that’ll hold the border pavers installed over the concrete. A clean surface will ensure the glue bonds more strongly overall. Use a quality concrete cleaner for this stage of the process.
You can also mix some muriatic acid in water—if you can adhere to the recommended safety instructions. It’s a good idea to work with a deck stripping brush. Once you finish cleaning the concrete patio, hose it down with water.
3. Glue the Border Pavers Over the Concrete
Set each paver down and run some construction adhesive on the side of it. This will ensure the sand can’t wash away from between pavers once you’ve set them down. As the concrete is drying, use a chalk line and a tape measure to outline the borders’ location carefully.
With the chalk line as your guide, glue the border pavers down along the house and across the patio’s two sides. If you end up with some squished-up adhesive between pavers, don’t wipe it off. Allow it to harden, and then trim it off the patio blocks using a utility knife.
4. Lay Down Fabric & Make a Flat Bed of Sand
Lay down some landscape fabric first to ensure the sand won’t get washed down into cracks. Then position the screed pipe before spreading the sand. Flatten the sand using a piece of wood before using a plate compactor to ensure the sand is flush with the border. A 2x6in (5.08×15.24cm) piece of wood is often good enough to serve as the screeding tool. This part of the project is difficult and may require you to enlist extra help.
You may be wondering why it’s best to use sand instead of just gluing all the pavers down. Think about the length of time it’d take to glue everything down and the extra cost you’re sure to spend on adhesive.
5. Lay Your Pavers and Complete the Border
With the sand flat and compact, it’s time to cover the “field” with pavers. After you do that, glue the remaining border pavers down before tamping the field with a plate compactor. Sweep sand over the pavers to fill in the remaining gaps.
The rest of the process is similar to what you’d expect with any typical paver project. Scrape away any excess sand and cut off excess landscape fabric using a utility knife. Glue any remaining border patio blocks down and allow the glue to dry for a couple of hours.
Covering a Concrete Patio With Wood
Covering a concrete patio with wood is an excellent way to make it cozier and warmer. It’s also another good way to cover up the imperfections on your concrete patio. The process is straightforward. You can floor the patio with wood either by using conventional tongue-and-groove floorboards or 5/4 treated decking.

What You’ll Need
These are the tools and materials you need:
- Floorboards
- Tape measure
- Broom
- Flooring nailer
- Jamb saw
- Level
- Handsaw
- Protective gear
You’ll need most of the standard gear typically required for a wooden floor installation. As always, rent costlier tools so you can save money. With everything sorted, it’s time to get the job done.
This project has two main stages: the batten installation stage and the wood floor installation stage.
Install the Battens
To install the battens, follow the steps below:
- To install the battens, the first thing you need to do is to cut enough boards of 1x4in (2.54×10.16cm) treated lumber and run a row from the house to the front part of the patio.
- Cover the entire width, maintaining a spacing of 16in (40.64cm) throughout. These are the battens.
- Connect the two outside battens to the porch with the aid of some anchors.
- Drill 1/4in (0.64cm) pilot holes through the board, ensuring you’re maintaining even spacing. There are three types of spacing to maintain. One of the holes should be at least 4in (10.16cm) from one end of the board, another hole from another end of the board also 4in (10.16cm) away, and then one hole every 20in (50.8cm) along the length of the board, measured from the first hole.
- With the holes drilled, set the pre-drilled batten in position, making sure it’s flush with one side of the patio and running from the house to the front side of the patio.
- Drill 1/8in (0.32cm) deep through each of the pilot holes you made above. You can achieve this with a 3/16in (0.48cm) rotary mason’s bit. This will be the position for your pilot hole in the concrete.
- Remove the board and drill the locations you’ve marked to a depth of 1½in (3.81cm). Get rid of the dust from each hole.
- Put back the board and then drive 2×1/4in (5.08×0.64cm) anchors from the batten down into the patio. Do this for each of the pilot holes. Repeat the step for the batten at the opposite side of the patio.
- With the remaining battens, space them across the porch from one end to the other. Ensure they’re spaced 16in (40.64cm) from center to center.
- Attach each batten with some concrete screw at each end of the board. Repeat the process for the end battens.
Install the Wood Floor
To install the wood floor, follow the steps below:
- Start from the front edge of the patio and lay out the floorboards one row at a time. If you’re working with treated 5/4 decking, make sure there’s adequate space between the ends and the edges of each board.
- Leave at around 1/8in (0.32cm) ideally to make room for swelling. You can also work with the width of a standard treated deck screw.
- Attach treated decking boards with treated deck screws that are 1½in (3.81cm) long. Be sure to drive at least two screws into each batten along each board’s length.
- For tongue-and-groove wooden floors, it’s best to follow the manufacturer’s instructions. Generally, each piece will neatly link to the next one closest to it.
- Attach the boards with finish nails punched through the face of the floorboards down into the batten. The nails to use should be 1¼in (3.18cm). You can punch in the nails with a hammer, but a pneumatic finish nailer and compressor will make the work a lot faster.
- Ensure the nail heads are punched below the surface to avoid painful contact when you walk across the surface.
- Once you finish fixing the floorboards, it’s time to fit the width of the remaining gap. Set it in place and nail it down as you’ve done for the other parts of the flooring. On tongue-and-groove floors, don’t nail the second-to-the-last row down until you have the final piece in place.
- To achieve a clean look at the end, add a piece of quarter-round molding over the flooring against the house so you can ensure all remaining gaps are covered.
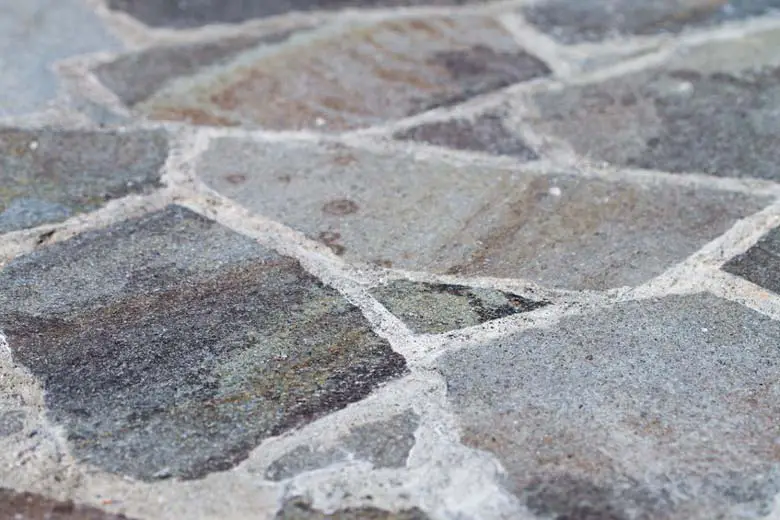
Covering a Concrete Patio With Flagstone
Flagstone patios can improve the look and feel of your home a great deal. The process is similar to covering a patio with pavers, so you’ll need a similar assortment of materials apart from the flagstone. With your supplies ready, follow the steps below.
1. Prepare the Patio Surface (Clean, Add Sand, Etc.)
Follow these steps to prepare the patio surface:
- Make sure there are no broken parts and brush off all debris.
- Check to be sure the surface is flat and even using a level. If the surface isn’t flat, the flagstone installation will look uneven and fall apart pretty quickly.
- Use some landscaping fabric to cover the surface before pouring a 4-6in (10.16-15.24cm) layer of sand.
- Make the sand flat and compact with a piece of wood. Some people skip this step, but the extra cushion is important if your patio isn’t completely flat.
- Fill in low areas or areas where broken pieces of concrete are visible.
- Dig around the side of the concrete patio and fill it up with more sand where necessary until you achieve a level surface. For cracked areas, consider filling them up with cement. You can also use materials like thin-set mortar in line with the manufacturer’s directions.
2. Lay Down the Flagstone & Make a Rough Layout
First, design a rough layout for your flagstone piece by setting them down on the patio.
This will give you an idea of where each stone will go before you get started. Make sure you choose the top side of the stones to ensure smoothness and better visual appeal overall.
Putting the underside on top is also a safety hazard if you stub your toes, trip, or fall while walking around the patio after finishing the job. Trim the stones around the patio edges using a mortar hammer or a circular saw to ensure they don’t hang over and look unsightly.
3. Work in Small 4×4 Sections
Map out a 4x4ft (121.92×121.92cm) area to work on and lay down the mortar for the flagstone base. Larger chunks of flagstones often need a deeper layer of mortar than the smaller pieces, so you have to watch the application process.
For a proper fit, you have to bury at least one-quarter of the flagstone into the mortar. Tap each stone gently using a rubber mallet. Use a level to check each stone laid down against the others to ensure an even plane.
4. Fill In Cracks With Mortar or Gravel
You can fill the spaces and cracks between stones with either mortar or gravel, depending on the look you’re targeting. If you choose to fill gaps with mortar, be sure to apply it liberally. You can use a float to remove any extra.
Wait for the mortar to dry for 10 to 15 minutes, then wipe the flagstones with a rag dipped in water. The gray film caused by mortar can take a while to disappear, so you may need to wipe with the rag a few times.
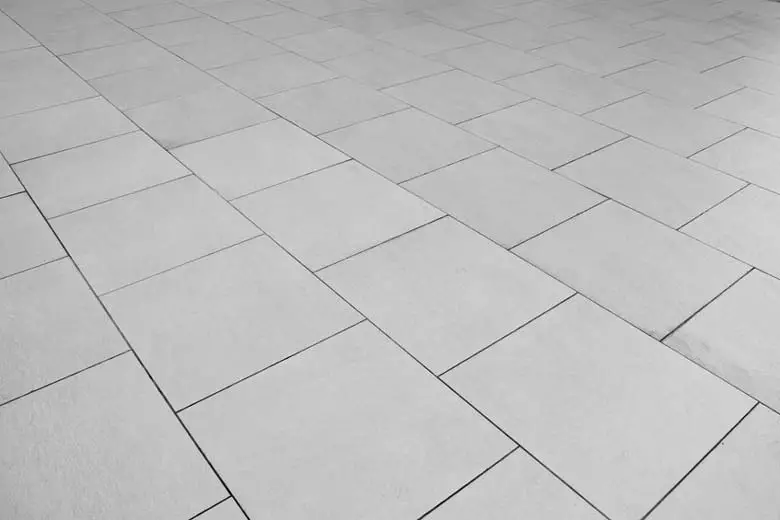
Covering a Concrete Patio With Tiles
Tile flooring is one of the most durable options you can go with when looking to cover your concrete patio, and there are lots of beautiful designs you can choose from.
What You’ll Need
The tools and materials you’ll need include the following:
- Sponge
- Rubber Float
- Grout and Sealer
- Trowel
- TSP Cleaner
- Tiles
- Thin-set mortar
- Industrial scrub brush
Here’s how to get the job done:
1. Clean the Surface With Warm Water & TSP
The process of cleaning and transforming your concrete patio with a tile should start with cleaning it first. You can do that with some TSP cleaner, warm water, and an industrial scrub brush. Scrub the surface clean, making sure you stick to all directions, then rinse it out with warm water.
2. Mock-Lay the Tiles Without Mortar
Also known as a dry lay, this step will help you confirm that you have enough tiles to cover the whole patio. You’ll also see parts of the tile to cut before it’s time to apply your mortar. You’ll have to work fast when you start laying the tiles, so it’s always a good idea to know where each tile will go before you start the laying process.
3. Install the Tiles With Thin-Set Mortar
Mix your thin-set mortar accordingly by following the manufacturer’s instructions. When you’ve achieved the perfect mix, spread it smoothly over the concrete patio’s surface, working in small sections per time.
Create grooves on the mortar using the comb edge of your trowel. With the mortar spread on a section, start placing your tiles side by side, working with spacers to maintain the same size gaps. Repeat the process until you’ve covered the patio.
Once done, wait for the mortar to dry overnight before going ahead with the rest of the process.
4. Remove the Spacers & Begin Grouting Lines
To start grouting the tiles, follow the steps below:
- Remove the spacers first, and then eliminate any excess mortar from the gaps with your utility knife.
- Mix the grout in line with the manufacturer’s instructions.
- Pour the grout over the tiles, plugging gaps with a rubber float.
- After you finish grouting the tile, wipe away all excess grout using a slightly damp sponge. Rinse and repeat until you’ve wiped everything away.
5. Seal the Grout in a Few Weeks
Your new tile patio will be exposed to the elements, so this step is very important. Without sealing, your grout won’t be water-resistant. However, it’s important to avoid rushing this process. It’s best to wait a few weeks for the grout to cure first.
Once it has cured properly, you’re ready to apply the grout sealer. It’s also a good idea to caulk the edges where the tile meets your home to prevent water sitting on the patio from flowing into your home.
Covering a Concrete Patio With Carpets
Using an outdoor carpet to cover your concrete patio is another excellent way to bring the space to life. It also holds a wide range of benefits.
Apart from the fact that it’s an easy way of making the patio more comfortable and aesthetically pleasing, it’s also a material you can count on to hold up nicely against environmental factors, as well as keeping your concrete patio cooler a hot summer day.
Related article: Do Outdoor Rugs Damage Concrete?
Installing the carpet as a DIY project is simple. If you have some time on your hands, you can save a decent amount of money.
What You’ll Need
You’ll need a few materials for this job, including:
- Utility knife
- Carpet adhesive or double-faced tape
- Tape measure
- Roller
- Trowel
- Floor patch
- Straightedge
Here’s how to do it:
1. Measure the Length & Width of the Area
Before installing the carpet on your patio, you need to determine exactly how much carpet you need for the project. You can discover this with your tape measure. For a simple square or rectangle patio, the job should be easy enough. You only need to get the width and the length of the space.
For oddly shaped spaces, you’ll need to be a bit more elaborate with your measurements. Draw a diagram with dimensions, and you can get a recommendation on how much carpet you need when you get to the store.
2. Choose Carpet That Can Handle Elements & Traffic
Outdoor carpets come in a wide range of styles and colors. They also come with different types of backings. To decide on a carpet, settle on a style and color, and consider any unique challenges you expect the carpet to overcome. Does the patio get a lot of foot traffic? Is it too exposed to the elements? These are factors you should weigh.
Once you’ve settled on a carpet, visit the store to check them out physically. If your preferred colors and styles aren’t available, you can place an order and wait a couple of weeks for the store to bring it in.
Don’t forget to get the right adhesive for gluing down the carpet.
3. Prepare Your Patio & Fill Dents With Cement
Before you start laying the carpet, you need to ready the concrete surface. It should be flat, clean, and dry. If there are any dents on the surface, you can level it up using a floor patch.
For deep gouges, filling with cement is a better idea. With the surface adequately fixed, you’ll have a cleaner installation when you finish.
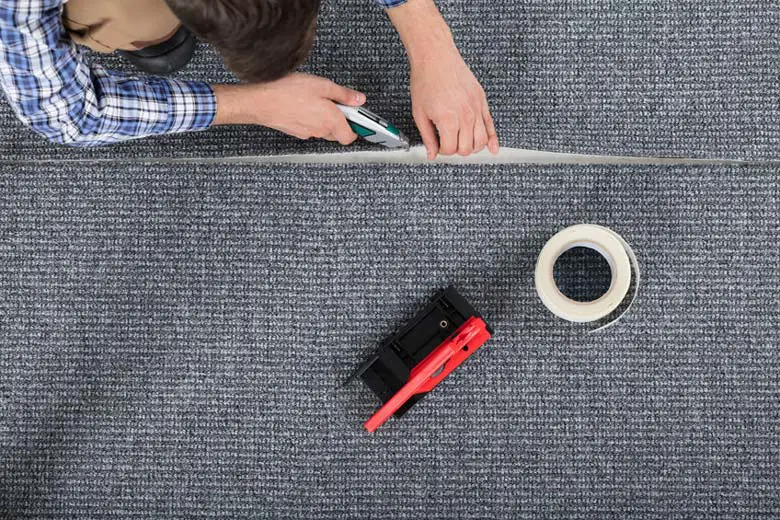
4. Spread the Dual-Faced Tape or Adhesive
For dual-faced tape, make sure it’s spread out around the area’s perimeter and some parts of the middle. For carpet adhesive, you have to use a trowel to spread it properly onto the concrete. Don’t apply it all at once, though. It’s best to work on one half first.
5. Rollout the Carpet
With the adhesive or dual-faced tape in place, it’s time to lay the carpet down into it. Make sure it’s straight, covering up the edges of the patio properly. Press the carpet to ensure it’s firmly on the tape or glue.
If you’ve used glue on the carpet, consider rolling with a carpet roller. Any other heavy material that won’t scuff up the carpet will also suffice. Do your best to ensure that the carpet is flat against the concrete.
If you seam two pieces together during the installation, you can make sure both sides fit together smoothly with a straightedge. Once your adhesive has dried thoroughly, you’re ready to enjoy your time out on the patio with your new carpet covering.
Which One Is the Best?
It’s hard to settle on an overall best covering for your concrete patio. The best cover will vary from one concrete patio to another. Other factors such as budget, DIY skill-level, and unique environmental challenges all play a role in determining which option to go with.
Covering your concrete patio with a carpet is logically the easiest, but even the most beautiful carpet can be a poor fit for the overall aesthetic appeal of certain properties. Pavers and flagstone are the most durable, but they can be more challenging to pull off for the average DIY enthusiasts.
So, evaluate your skills, budget, and peculiar needs to choose the best cover for your concrete patio.
Conclusion
You don’t have to break the bank to transform the look and feel of your concrete patio. With so many affordable methods of covering up the patio, you just need a bit of time and some DIY skills to get the job. With some of the simpler methods, you can complete the makeover in just a couple of hours.
Whichever option you choose, focus on doing the job in the best way possible. Seek extra help if necessary to avoid wasting time and resources on a job you’ll have to redo.