Self-leveling concrete is a mixture of cement, water (and often fly ash), and other additives that help develop desired qualities. It can be made with or without polymer additives that allow for adjusting the viscosity and workability of the mix.
You can make self-leveling concrete up to 5/8 inches (1.58 cm) thick. If you need a thicker base, use multiple 5/8 inch layers, allowing each layer to cure in-between applications.
When mixing concrete by hand on a large scale, it is generally best to use premade batches of self-leveling concrete (available at nearly any hardware supply store). This article will cover how to mix and apply self-leveling concrete in layers with the correct thickness.
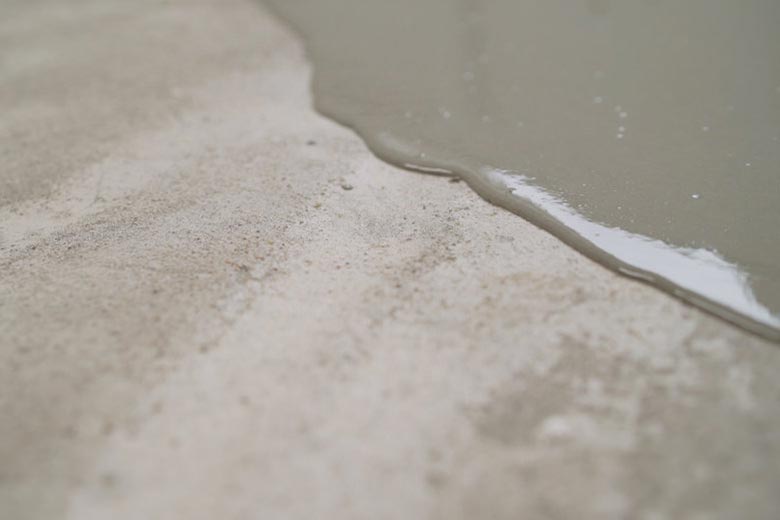
Table of Contents
How Should I Mix Self-Leveling Concrete to the Right Thickness?
Concrete caulk is also known as “self-leveler” or “self-leveling” concrete. This type of concrete doesn’t require the use of forms or special finishing techniques to create a flat, level base for flooring, countertops, tiles, and more.
To mix self-leveling concrete to the right thickness, you’ll need to follow the manufacturer’s directions, adding the dry mix to water. Use approximately 5 quarts (4.7 L) of clean potable water per 50 lb (22.6 kg).
Use Thinner Layers When Using Self-Leveler on Countertops
The thickness of your self-leveling concrete will depend on what you’re using it for. For most countertops and floors, one layer that is about 3/8 inches (0.95 cm) thick is sufficient.
The thickness of your final layer will depend on what surface treatment you use afterward. If you’re applying tile to the surface, allow the tiles to set in place before applying grout because if too much pressure is applied during installation, it may crack or break them until they’ve had time to adhere securely onto the floor.
A good rule of thumb is if you add too much water–up to 50% more than recommended on the package–add more concrete mix in equal proportions until it’s thick enough. If you add less, it may be too thick and require additional water.
Once mixed, allow time for excess air bubbles to escape before applying self-leveling concrete in layers onto a surface (10 minutes for small areas and 30 minutes or longer for larger areas).
Here is a YouTube video that details mixing self-leveling concrete:
Use Self Leveling Floor Resurfacer With Thicker Layers
Floor resurfacer is used with thicker layers to account for shrinkage, but there is a risk that you might make the covering too thick. If so, it will need more mixing water and could crack.
For floors, self-leveling floor resurfacer should be at least 1/4 inch (0.63 cm) to 1-1/2 inches (3.81 cm) thick.
Using self-leveling concrete is simple once you learn the basics of handling materials quickly before they dry. Practice on your own surfaces before applying self-leveling concrete in public areas or around any equipment that may get damaged if cracks form underneath it.
Once you understand how to mix up this type of compound, adding different colors and textures can also create unique designs.
Meanwhile, cured self-leveling concrete has a smooth finish that minimizes the appearance of trowel marks. It will even out small surface variations on its own over time — making it ideal for situations where shorter-term projects are concerned.
A common question many people have about this type of concrete is how thick they can make it before adding another layer. The answer lies in curing time, which varies depending upon the thickness used.
How Do You Prepare Floors for Concrete Self-Leveler?
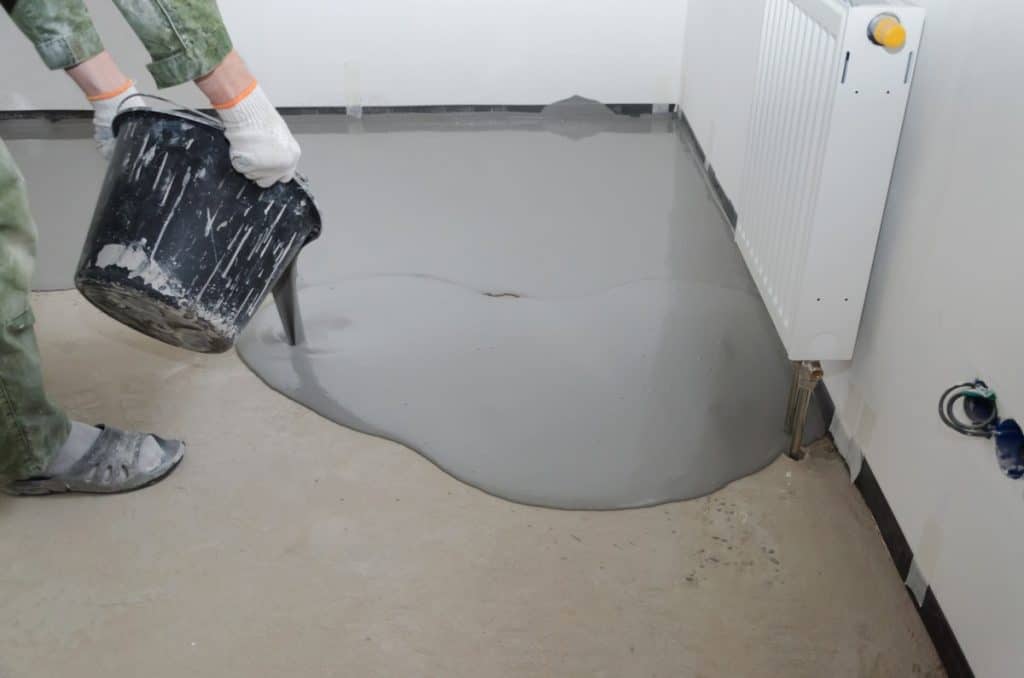
Applying self-leveling concrete is easy. Do not use metal containers, which will corrode when in contact with chemicals in the product. Stir slowly at first and then gradually increase speed until all materials are blended completely.
To prepare your floors for applying self-leveling concrete:
- Use a mechanized floor sander or angle grinder to remove all the old coating.
- Clean ruts out of the concrete with a wire brush or broom, making sure it is completely free of any loose material.
- Sweep until the surface is smooth and even.
You can mix up enough self-leveling concrete in your mixing container to cover around 16 square feet (1.48 square meters) at a time. Stir this for about four minutes using an electric drill to get rid of all air pockets that have formed in the mixture. Pour half into one section of floor, then go back when it has settled and pour more on top where needed.
Self-Leveling Concrete Floor Tips
Self-Leveling Concrete is available in five or ten-gallon kits at many hardware stores throughout the USA. If you need a lot of concrete mixed, consider buying directly from a bulk supplier. Below are some tips for using self-leveling concrete on floors:
- Remove mortar residue. If you have excess mortar residue left after removing old flooring, use an angle grinder with a wire brush to clean it away and prepare the surface for leveling.
- Use feather finish. Using feather finish between subfloor panels and over screws and nails will prevent the self-leveler from moving into adjacent rooms or underneath the subfloor.
- Mix small batches. You should only pour the amount of self-leveling floor concrete that you can spread within a 20-minute time period. This is because it begins to set in around 10 minutes, though it will be much easier to work with if you wait 20 minutes before applying more.
- Clean the floor before pouring. Pouring self-leveling floor concrete over loose debris, dirt, or dust will cause the floor to shake and crack. It is necessary to clean your subfloor before pouring, and you can do it using a pressure washer since the material requires clean surfaces that are free of dust or other particles for proper application.
- Let it cure. A self-leveling floor mix needs at least four hours to dry properly, so make sure not to walk on it or disturb it until after this time period has passed. If you try to do so before then, cracks may form in the concrete that will be harder to patch after it has fully set.
It’s important to remember that self-leveling concrete is like any other pourable floor surface; make sure it’s smooth, level, and properly cleaned before applying.
For kitchen countertops, it helps to clean with trisodium phosphate (TSP) beforehand to help prevent staining or discoloration in high-traffic areas where food might get caught if not cleaned well enough immediately after stains occur.
Here’s a YouTube video that goes in-depth on some tips to use when applying self-leveler to bathroom floors:
Self-Leveling Concrete Alternative
If you’re looking to avoid the cost of pouring a new floor but still want that seamless and smooth flooring like self-leveling concrete provides, there are alternatives available. One of the most common alternatives to self-leveling concrete is an epoxy floor leveler.
Epoxy Floor Leveler
Like cement floor levelers, the epoxy floor leveler is used where you want the same smoothness and leveling capabilities of self-leveling concrete but on a smaller scale.
While it may not provide the durability or support needed in some cases, epoxy floor levelers will bond well with other surfaces and won’t break down over time, unlike cheaper alternatives.
Higher-end epoxies set quickly while still allowing more flexibility by decreasing shrinkage. Setting times vary from 30 minutes up to 4 hours, depending on the brand and room temperature.
Related article: DIY Leveling Concrete: Is it something you can do yourself?
Conclusion
Self-leveling concrete should be applied in a 5/8 inch (1.58 cm) thickness for small jobs like countertops but can be up to 1 1/2 inch (3.81 cm) thick for floors. Be sure to follow the manufacturer’s instructions when mixing and applying the product.
Epoxy floor levelers are more expensive, but they set faster. They are ideal for slab-on-grade applications and will bond well with other surfaces. If durability or support is needed, choose an epoxy product rather than a concrete mix.