Whether you are interested in upgrading your flooring, replacing old laminate, or revealing a concrete floor, removing old flooring can be challenging if you don’t know what you are doing.
To remove vinyl floor tiles from concrete, you will need to scrape up the tiles and remove the floor’s adhesives. You can use pry-bars, spatulas, or stripping tools to remove the vinyl, and if you want to speed up the process, you can use heat to melt the adhesives.
In this article, we will give you some useful tips for removing vinyl floor tiles from concrete slabs. We will tell you everything you will need to complete your project, and we will teach you the best method of getting vinyl and vinyl adhesives off of concrete. If you follow these steps, your vinyl removal job will be a piece of cake.
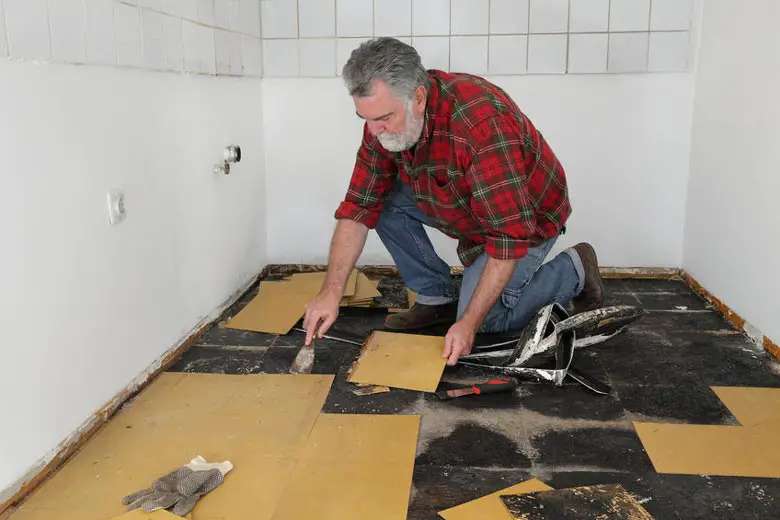
Table of Contents
How Is Vinyl Fixed to Concrete?
Most vinyl flooring rolls or tiles come with self-adhesive backing. This sticky backing makes putting down vinyl an easy task since all you have to do is push it down without using any additional glue. However, over time and with a lot of wear, the self-adhesive gets stickier since pressure and heat melt the glue into the concrete surface. So, if you are replacing older vinyl, it will be more challenging to remove.
It is pretty easy to remove vinyl tiles from concrete, though, especially when compared to wood. Since it is so simple to strip vinyl from concrete, this is a great DIY project for anyone who has the time and energy to invest in the process.
Tools and Materials Will You Need To Remove the Vinyl
Essentially, all you will need are:
- A scraping tool such as a chisel, pry-bar, spatula, or stripping tool
- Thick work gloves
- Goggles
- A mask
- A container for tiles once you have removed them.
- A heat gun (optional)
- A knife to cut the vinyl (only if you are removing vinyl rolls, not tiles)
Depending on how stubborn your tiles are, you may want to use different scraping tools to speed up the removal process. There are also a few pro-tips you might want to know that will save your hands and the floor from any additional damage.
Scraping Tools
When you remove your vinyl tiles, you can use one of several tools to pry up the laminate. You can use a hammer and pry-bar, a wide chisel, a stripping tool, or a metal spatula to scrape the vinyl flooring off of the concrete.
Generally, any thin metal scraping tool will get the job done for you, although you should use a sturdier tool if the tiles are difficult to remove.
Thin metal instruments will work fine on thinner or relatively new vinyl flooring, so you should investigate your flooring before you start to remove it. If you can pull up the corner of your flooring with your bare hand, a spatula or stripping tool will work fine for you.

However, sometimes a metal spatula just won’t cut it. If you are working with thicker vinyl tiles, such as those with multiple layers, you might want to use a hammer and a pry bar or thick chisel. These thicker metal tools will remove the tiles quickly and in large pieces, making stubborn vinyl tiles come up with ease. Thick, rigid tools are also less likely to bend under the pressure of hammering.
If you choose the right scraping tool, removing vinyl tiles is easy. You should make sure that you are using the right tool for your vinyl flooring since using the wrong type will make the whole process more work-intensive and time-consuming.
Safety Gear
When you remove vinyl flooring, you must wear goggles, a mask, and sturdy work gloves to protect yourself from the sharp vinyl and the hazardous chemicals released when you remove any type of flooring.
Of these safety items, gloves are the most essential. Vinyl can be sharp, and beyond that, it can harbor all kinds of fungus and bacteria under it. If you cut your hand while prying up the vinyl flooring, you can quickly get an infection. Always make sure that you are wearing thick gloves, preferably with leather, rubber, or silicone palms, to ensure that you don’t end up getting a nasty infection from your floor.
When you pry up old flooring, small fragments of vinyl, mold, and dirt can get into the air, which is dangerous. Wearing a mask and goggles will keep you protected from anything growing underneath the flooring and from the shards of vinyl that will undoubtedly fly into the air while you are pulling it up.
Also, older vinyl, usually the types from before the 1980s, often contains asbestos. Asbestos, which is also commonly used in old concrete gutters, is extremely toxic, and it could cause you many health problems, such as lung cancer if you do not handle it correctly. If you are not sure how old your vinyl is, you should research the pattern to make sure that it does not contain asbestos. If it dies, you should hire someone else to remove the flooring.
Overall, it is crucial that you wear gloves, goggles, and a mask when handling old vinyl flooring.
Container for Your Old Tiles
When you are removing vinyl flooring, it can be hard to keep the area clean. If you stack your tiles on a spot you have already cleared, they will get stuck to the sticky concrete surface again. Sometimes, your tiles will chip and break, leaving many fragments that easily re-adhere to the concrete.
Using a large, sturdy container to keep the vinyl you have removed off the floor will help you keep the room clean and prevent the vinyl from getting stuck to the concrete. You can use a garbage can, plastic tote, bucket, heavy-duty garbage bag, or any other container. Keeping all of the material that you have removed from getting stuck to the clean concrete can make the job a lot quicker and simpler for you.
Heat Guns
If your tiles are stubborn and take a long time to pry up, you might want to use a heat gun. The heat from the gun will soften the vinyl, making it bend up more quickly. The heat will also melt the adhesives beneath the flooring, which can save you a lot of time and effort in the long run. If you are using a heat gun, turn it on to its highest setting and point it at the section of vinyl that you are scraping up. The tile should slide off easily once it gets warm.
Please note that if you are using a heat gun to remove the flooring, is it crucial that you wear the right safety gear. Since vinyl is made of plastic, it releases toxic chemicals into the air as it is heated, so you should always wear a mask. It is also easy to burn your hands when using heat to remove vinyl, so you should wear heatproof gloves if you use a heat gun.
Knife for Vinyl Rolls
If you have rolled vinyl flooring and not tiles, you can use a knife to cut the vinyl into 6-inch (15 cm) wide strips before trying to remove it. Cutting your flooring into sections will make it much easier for you to remove the long sheets of vinyl, and it will leave less adhesive residue on the concrete.
Usually, removing the vinyl tiles will take a few hours for every room that you are working in, so you should make sure that you have enough time to complete the job before starting. Once you find the time and have all of the tools you will need, it is time to pull up the vinyl. To remove vinyl flooring tiles, follow these simple steps.
7 Steps To Remove Vinyl Floor Tiles From Concrete
1. Clean the Floor and Remove All Furniture
Before you begin to pull up your vinyl flooring, remove all of the room’s furniture and give the floor a good clean. It would be best if you first swept and then mopped the floor with an antibacterial cleaning solution. Cleaning well will keep you from inhaling dirt, dust, and bacteria when you are down on the floor handing the vinyl.
2. Soak the Floor With Soapy Water (Optional)
You do not have to soak the tiles, but it is helpful to do so. If you cover your vinyl flooring tiles in soapy water or vinegar before removing them, the glue will be a lot softer. The longer you soak the tiles, the weaker the adhesive will be, so you should soak them overnight or longer to make your job a lot easier.
3. Get Your Tools Together and Put On Your Safety Gear
Before you begin ripping up the vinyl, you will probably want to get a container to put the old flooring material into. You can use a garbage can, a plastic tote, or a bucket, but making sure that your flooring receptacle is there before you get started will save you from any additional mess. After you have the container ready to go, lay out all of your tools, and put on your mask, gloves, and goggles.
4. Pour Water on the Tiles Before Removing Them
If you pour a small amount of water on the tiles as you remove them, the liquid will soften the glue and reduce the amount of dust that can get into the air. Using water makes removing vinyl flooring tiles much more straightforward and safer, so it is essential.
5. Start Removing the Tiles With a Scraping Tool
Now that you have all of your safety gear on and your tools ready, it is time to remove the vinyl. It is usually best to start in the corner of the room that is farthest from the door so that you can work your way across the edge of the room without having to sit on the sticky, concrete floor.
Take your scraping tool and insert it under the vinyl’s edge, prying up the outer edges of all four corners of the tile. Older tiles might be harder to remove, and they usually come off in small chips, so you should not be surprised if this happens to you.
Once you have loosened up the edges, you might be able to pull up the whole tile with your hands. If you cannot, keep scraping until the entire tile is loose. Place each tile that you remove in your disposal container to keep the tiles from sticking to the floor again once you have pulled them up.
6. Keep Going Until All the Tiles Are Removed
If you have many difficulties pulling up the tiles, you might want to look for a more durable tool, use a hammer to drive your scraping tool under the tiles, or use a heat gun to soften the adhesive.
7. Dispose the Old Laminate Tiles
If you damaged your tiles in the removal process, you might want to throw them out. If you don’t want to get rid of them, though, you can still use them for other projects.
You can reuse old laminate tiles for flooring, but they are also great for leak protection, under-cabinet liners, potted plant coasters, and other household projects.
Now that you have removed your vinyl tiles, the hard part of your job is done. You may notice that the tiles’ vinyl adhesive is still clinging to your floor, which is not a problem if you are about to install new flooring over the concrete.
However, if you want to remove the adhesive, stick with us. We will tell you the simplest, most time-efficient way to remove the adhesive, leaving you with clean, smooth flooring.
How To Remove Vinyl Adhesive From Concrete
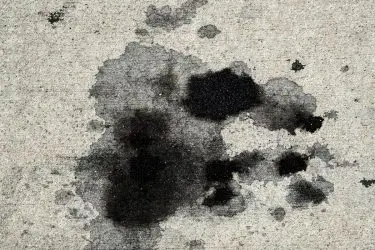
Stubborn, sticky adhesive leftover from removed vinyl tiles can be a pain to clean up, and it can be quite an eyesore. Since the glue has been underneath your flooring, it is often coated in dark, unsightly dirt and sometimes even fungus.
Removing this sticky residue might seem like an impossible task, but there are a few ways to make it quick and easy.
There are two different, easy ways to remove the adhesive. You can either use hot water to dissolve the glue or use a chemical cleaner such as goo-gone. If you want to remove the adhesive from your concrete flooring, you will need:
- A broom or vacuum
- Hot water or a commercial adhesive stripper
- A scraping tool such as a metal spatula
- Rags
- A bucket
- Safety gear such as gloves, goggles, and a mask
Once you have all of your tools, it is time to get started. To remove vinyl adhesive from concrete follow these steps.
1. Clean the Floor
Before removing the adhesive, clear the area of all furniture and clean the floor with a stiff-bristled broom or shop-vac.
A good cleaning will eliminate as much grime from the glue as possible, making the adhesive removal process much quicker and easier.
2. Put On Your Safety Gear
Once the floor is clean, put on your mask, gloves, and goggles to protect you from your adhesive stripper.
Whether you are working with hot water or a chemical solution, you will need to keep your hands, eyes, mouth, and nose covered to prevent any injuries or health problems.
3. Soften the Adhesive With an Adhesive Stripper

To soften the adhesive, you can either use a commercial adhesive stripper like Goo Gone Pro-Power Professional Strength Adhesive Remover or boiling water.
Generally, chemical strippers are easier to use since you do not have to worry about burning yourself with boiling water.
Pour the glue stripper of your choice on the concrete floor and allow it to sit for 5-10 minutes, ensuring that the liquid has enough time to dissolve the glue.
4. Scrape the Glue Off of the Concrete
Using a metal spatula or any other thin metal tool, scrape the glue off of the concrete. Work in small sections to help you ensure that you get every spot.
Use a wet rag to clean off your spatula regularly so that the sticky residue cannot get back onto the floor’s surface.
Generally, it is best to mentally divide the room into long strips to ensure that you get every spot. Gradually work your way across the room, ensuring that you get all of the superficial adhesives off the floor.
5. Wash the Floor
Once you are done scraping, you may want to go back over the surface with hot water or your cleaning solution to eliminate any stubborn adhesives stuck in the concrete’s pores.
Use a clean rag to wash the floor, rinsing it regularly to ensure that you are not spreading the glue that you just removed back onto the floor. You may want to change out rags regularly to keep all of the adhesives off the concrete surface.
6. Let the Floor Dry and Check for Sticky Spots
Once the floor is dry, you might want to walk over the concrete floor to check for any areas that you might have missed. If you find any sticky spots, use boiling water or your adhesive stripper to remove the residue. Once the floor is smooth and stick-free, you are all done.
Conclusion
Removing vinyl floor tiles is simple, as long as you know what tools to use and how to make the job as easy as possible. Whether you are upgrading, replacing, or repairing vinyl flooring, we hope that these tips and tricks will help you improve your home. Now that you know how to remove vinyl tiles from concrete like a pro, it is time to take on all of your DIY projects with the utmost confidence.