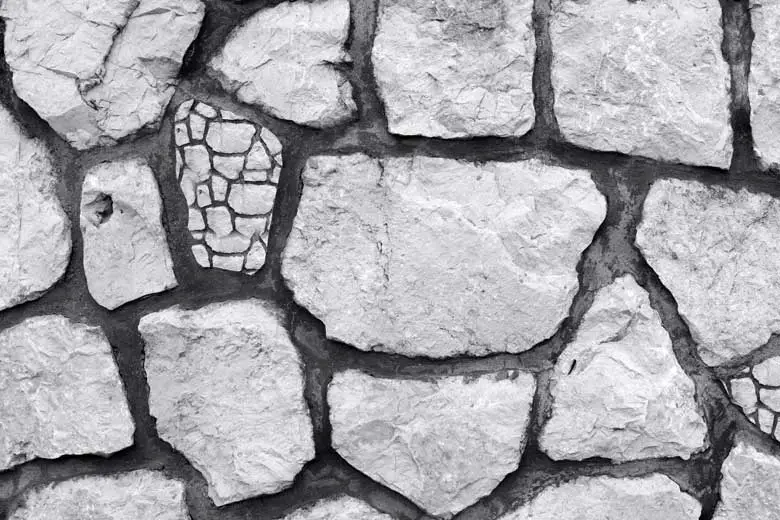
Remodeling a concrete wall to have a real stone appearance can cost you big bucks. However, by using faux stone painting, you can give your home or office the same warmth that natural stones usually add to a room. So, how can you paint a concrete wall to look like stone?
To paint a concrete wall to look like stone, clear the work area, clean the surface with a mild detergent, apply the base coat with a paint roller, and use tape to mark out ½ – ¾ inch “grout” lines. Use stone-like acrylic paints like granite or flagstone, and then use a sponge to apply the color.
If you’re reading this, chances are, you want to transform a dull wall into a warm and welcoming faux stone wall. If that’s the case, then you couldn’t be in a better place. Read on as we break down all you need to know about painting a concrete wall to look like stone.

Also Read: What Is Faux Concrete Made Of?
Table of Contents
Prepare the Area
Although DIY painting can be a very rewarding process, it can also become tedious and ruin a room’s aesthetics if you prepare inadequately. Therefore, to be on the safe side and avoid applying paint to unwanted areas, here’s what you need to do:
Clear Knobs, Outlet Covers, and Furniture From the Area
While this step might sound straightforward, it is essential to succeed when DIY painting your concrete wall to look like stone. You’ll need to remove knobs, switch faceplates, outlet covers, thermostats, and other items that might get in the way as you paint.
If you’re unable to unscrew some accents on the wall, you’ll just have to cover them with painter’s tape before you start painting.
Once you’re done removing paintings, photos, and other potential obstructions from the concrete wall, your next step is to clear all furniture from the work area. As you might already know, removing paint can prove impossible once droplets land on upholstered fabric.
Therefore, to be on the safe side, it is best to remove nearby furniture and appliances to avoid potentially irreversible stains.
Once your working area is free of furniture and other accessories, the next step is laying down a drop cloth. There is no specific drop cloth you should use, but a plastic tarp can help get the job done effectively if you already have one from a past project.
Avoid flimsy coverings like bedsheets and newsprint as they’re usually too thin to prevent the paint from soaking and passing through. Plus, you don’t need an extra-large drop cloth since you can slide a medium-sized one across the room as you continue working.
However, the golden rule is to ensure your preferred drop cloth always extends to the wall base for maximum floor protection.
Clean the Wall Surface With Cloth, Soap, and Water
You should never skip this step, even if you’re working on the normally clean interior walls. Failure to clean the wall will almost certainly affect how well the paint sticks, and you certainly don’t want that. Therefore, gather a mild liquid detergent, a clean cloth (or sponge), and warm water, and then wipe the cloth over the concrete walls.
To save on time and energy, start cleaning from top to bottom so that the stains and water trickle down to untouched areas.
Be sure to remove dust, stains, and debris that could stop the paint from absorbing properly. You shouldn’t wash the walls so that they’re soaked, so you might want to wring out excess moisture from the cloth or sponge you’re using first.
Remember to fill in holes or cracks before applying primer. If you’re dealing with extra-stubborn stains, a small amount of Sunnyside Trisodium Phosphate (TSP) All Purpose Cleaner (link to Amazon) will help get the job done.
Although unnecessary, you might also want to sand the wall using high-grit sandpaper to ensure the paint adheres more evenly to the wall.
Cover Switches and Moldings With Painter’s Tape
Next, apply painter’s tape over your moldings. The tape can also help seal accents like dimmer switches that are hard or too time-consuming to remove. Ensure you place the tape evenly on all the surfaces to avoid messing with your painting dimensions.
It is also a good idea to look for different-sized tapes as you’ll need the tape to make grout lines after priming the wall with a base coat that resembles mortar. Make sure you cut off the tape accurately to prevent a lopsided design.
Apply a Neutral Base Paint Evenly With a Roller
The base coat serves two main purposes:
- To help the later paint applications adhere to the concrete wall
- To act as the grout for your faux stone wall painting
Remember, grout is a massive part of stone wall construction, so including it in your painting will make the faux stone appear more realistic.
The color of the base coat you use will come down to personal preferences, but you can never go wrong with cream, grey, and light beige.
Using a paint roller, apply an even coat, ensuring it covers all areas from the floor to the ceiling.
Your prime coat application doesn’t need to be too thick, assuming it’s a consistent and smooth coat. Try as much as possible to avoid leaving bare patches, as doing so might affect the final faux stone appearance once you apply the paint.
When working on hard-to-reach areas and tight crevices, ditch the roller and use a handheld paintbrush to fill the gaps instead. Again, it’s important to match the thickness of all the initially rolled sections. Also, you might need to apply two coats of your selected base.
It is vital to allow the basecoat enough time to dry properly before applying the paint.
You can easily cloud and smudge the base coat if you paint when it’s not yet dry. Running an overhead fan or opening windows can help the base coat dry faster and keep the project moving!
Use Painter’s Tape To Mark Grout Lines
Grout lines are integral to creating the stone style you’re after because they help determine the stone shape. This step usually requires a high level of precision since it determines your faux stone wall’s outcome.
Therefore, it is usually ideal for first-timers to draw the shapes with a pencil or chalk before applying the tape.
However, for some experienced DIY painters, applying the tape isn’t necessary as they normally use measuring tape to determine tape application. Ideally, ½ – ¾ inch (12.7 – 19.05 mm) blue painter’s tape should be enough to tape off the desired grout lines.
Since you want to achieve the most realistic look possible, you might want to cut the painter’s tape edges in some areas. Using a sharp razor knife is highly recommended as it will allow you to cut with a high level of accuracy.
Take as much time as needed in this step. After all, your ability to manage a perfect execution will determine whether you achieve the desired faux stone look. Ensure you understand the appearance of your preferred stone type and style, and use the blue painter’s tape to draw the most realistic grout lines you can manage.
An important tip to keep in mind: Thinner grouts work well for small-sized rooms. Using smaller bricks or stones is highly recommended to achieve a neat, classy faux stone appearance in a small room. However, for large spaces and walls, using large bricks or stones will help you achieve a more natural look.
Buy Acrylic Stone Paint (Flagstone, Graine, Etc.)
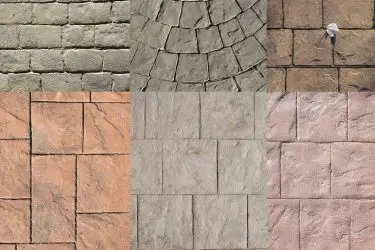
There are no specific colors to pull off a concrete wall that looks like stone. It all depends on the type of stone you prefer, as stone designs can range from marble to limestone, quartz, granite, flagstone, brownstone, fieldstone, and even travertine. Therefore, you should choose acrylic paints that best match your visions.
Painting stone on a concrete wall requires focus and patience. Choose two to three acrylic paint colors to help you achieve the texture you so badly want on your faux stones.
Ideally, one color should be a shade darker, but the other one should still be darker than the base color. Remember, the more colors you use, the more depth your faux stones will have.
Apply Darker Hues Using a Sponge and Glaze
Start by mixing the acrylic paints thoroughly to prevent the pigments and oils from separating. Doing so ensures better coverage and a smoother finish on your concrete wall.
Once you’re done mixing the paints, pour them into clean paint trays. Take a clean sponge and sponge on the glaze, targeting one stone at a time.
When sponging the stones, the trick is starting with the darker hue, sponging it on the edges to create a much-needed dimension.
Although the idea is to have a uniform faux stone wall, it’s also ideal to keep the stones looking natural, which means they shouldn’t come off as too identical. You can either use the same sponge to apply all the gazes or use a different sponge for every color gaze you plan to use.
Also, once you finish sponging the glaze on the stones, gently pat the stones with a clean, moderately dampened cheesecloth to soften and smoothen the glaze, giving it a more natural appearance.
Apply a Shading Glaze To Add Dimension
You can also use a shading glaze to create a richer, more believable stone look on your concrete wall. If you choose to apply a shading glaze, remember to target the darker areas where the stones meet the grout.
A fan-shaped artist brush will help you give the stones a bit of dimension as they’ll appear lifted off around the grout areas.
Paint From Top to Bottom To Avoid Drippage
While some people prefer painting without minding the direction, starting from the top moving downwards is always recommended. Starting by the ceiling allows you to work on the difficult parts when you’re fresh, meaning the stones at the top will act as a benchmark for the bottom ones.
Moreover, there won’t be any risk of ruining the already painted stones by working from the top.
However, a simple spill when working from the bottom going up might force you to redo some already painted stones, adding hours to your project!
Also, don’t be in too much of a rush to complete your faux stone painting in one day. Dividing your wall into sections will allow you to focus on each part independently, thus managing a much-desired level of consistency.
Use a paintbrush for the fine lines and tight spots and a sponge to apply the glaze on each stone’s larger parts. Remember to use a darker hue on the edges and finish each stone with a lighter hue towards the center.
Allow the Paint 48 Hours to Dry (Turn on a Fan)
Before you allow the paint to dry, take several steps back and examine the appearance of the wall. Check on the edges, the color saturation, and how the different glazes combine to create the stone wall effect. If pleased with the outcome, then it’s time to allow the wall to dry.
So, how long should you give the faux stone painting to dry? The amount of time needed for paint to dry largely hinges on the manufacturer’s instructions.
Switching on an overhead fan and opening the windows can speed up the drying process. Be prepared, however, that it might take up to 48 hours for the paint to cure completely.
Gently Remove the Painter’s Tape
After the paint has completely dried, it’s time to remove the painter’s tape. There is no formula when it comes to removing the tape since, after all, the entire wall has dried up. You can remove the tape from the bottom going up, or vice versa.
Once removed, your grouts should be fully exposed and complete the faux stone look.
If you correctly measured and applied the tape, your grout lines should complete the stone appearance, leaving your concrete wall looking neat and crisp. Check on how the grout lines intersect and make slight modifications or touch-ups if needed.
Some people prefer adding texture to the ‘mortar’ lines by using a darker hue. If you fall in that category, take a smooth brush and, using a darker hue (watered-down), carefully paint along the grout lines to create shadows and a believable cement effect.
Reinstall Wall Attachments and Return Furniture
Once you’re sure that the newly painted concrete wall won’t need any more modifications, it’s time to bring life back to the room. Remove the tape you placed on the molds and proceed to re-install the wall attachments you removed.
Take extra care and ensure you’re gentle enough to avoid ruining the faux stone presentation when installing back items like sockets.
You can now bring back your furniture and appliances to their transformed home and enjoy the new look. It is always best to avoid placing heavy items like furniture directly on the wall as they can leave scratch marks or remove the paint upon heavy impact.
Tips for Painting a Concrete Wall To Look Like Stone
Understand the Type of Design You Want
Before you start painting your concrete wall to resemble stone, you’ll first need to know the type of stone design you’re after.
Stones come in different shapes and sizes, and having a clear understanding of your preferred type will allow you to shape your stone edges and lay painter’s tape accordingly.
Take extra care when applying the painter’s tape, as it’s your best bet to having neat and believable grout lines.
Remember That Small Stones Work Better in Small Rooms
If you’re looking to paint a concrete wall in a small space, it’s best to go with a small stone design. Similarly, large stones look better on large walls.
When painting the stones, remember that not all stones are identical, so instead of trying to achieve a more uniform look, try to play around with hues and different stone widths. The trick is to remain consistent in your modifications.
Always Allow the Coats To Dry
Whether you’re working on ordinary painting projects or a faux stone wall painting, it is crucial to allow every coat to dry before adding another layer.
This means you shouldn’t start to paint immediately after applying the primer. Moreover, you should also allow the darker coats to dry before applying any type of finishing to your wall.
Keep in Mind That Cleaning the Wall Is Necessary Before Painting
While you might be tempted to start applying a base coat before cleaning internal walls, it is best to clean up before any painting work commences. Cleaning helps to remove dust and dirt from the wall, which would otherwise limit the base coat’s ability to adhere to the wall.
Therefore, clean the wall thoroughly and caulk up holes before you start painting. Working on a clean surface ensures your paint application process will go smoothly.
Related article: 11 Best Ways To Clean Concrete Basement Walls
Wrapping Up
Painting a concrete wall to look like stone will not only add a much-needed level of warmth to your living area but will also enhance the overall aesthetics of your space. When looking to paint a faux stone wall, the trick is to prepare well before painting.
Identify the stone you want to mimic in your wall and use a pencil or chalk to determine the edges and intersection points. Several blue painter’s tapes will come in handy in both sealing hard-to-remove wall accents and acting as grout lines for your faux stone wall.


