Sealing concrete greatly improves the durability and strength of your concrete as it prevents stains and fading. Whether it is old or new, the sealer refreshes the surface to enhance the appearance and life of the concrete. It is similar to people applying sunscreen before going to the beach, or insect propellant before going into the woods. Protecting concrete can be critical!
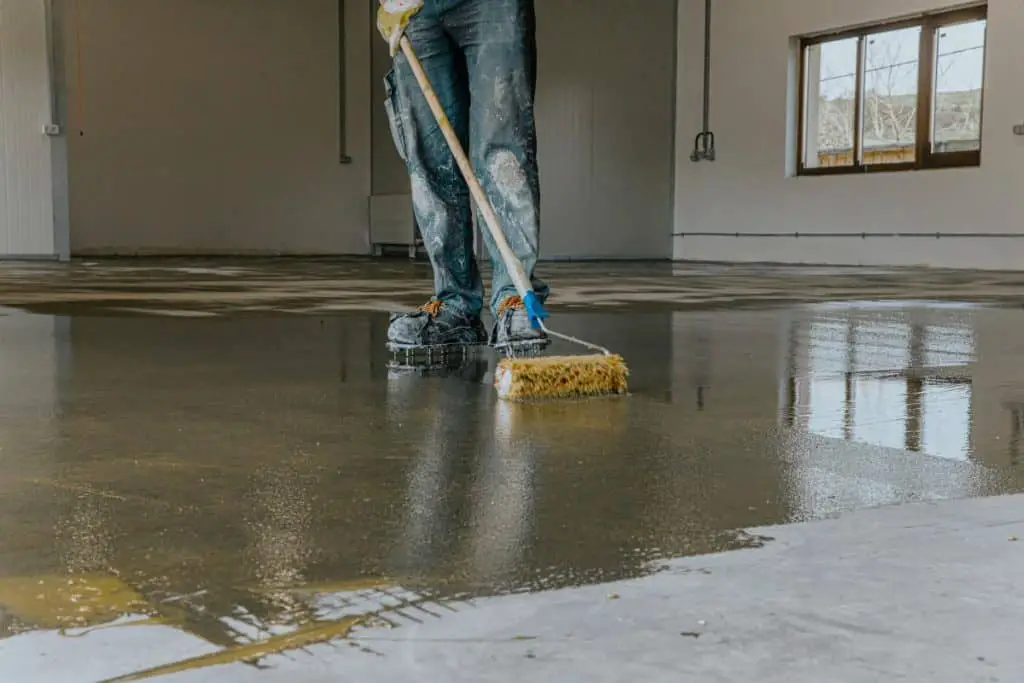
Table of Contents
1. Choose A Sealer
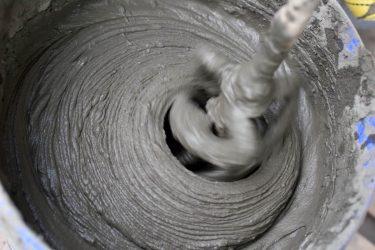
There are many different types of sealers and each works well depending upon the circumstance. A few common sealers are acrylic, epoxy, polythene, and silane or siloxane sealers.
- Acrylic Sealer – This is best used as an interior cement finish. They are thin and provide a protective layer for your concrete. In direct sunlight, they are likely to turn yellow and will not hold up well outside. It can be sprayed or painted on.
- Epoxy Sealer – While these sealers take longer to apply and dry, they offer much thicker protection. It also comes much more customizable than other sealers, allowing you to change the color and look of your concrete. This sealer also makes a great grip and doesn’t scratch easily. It is applied through pouring.
- Polythene Sealer – This sealer is great at the resistance of oil, grease, and other stains, as well as UV light. It is often used on countertops but can be expensive. This can be applied through a sprayer.
- Silane/Siloxane Sealer – These are penetrating sealers, meaning they soak into the pores of your concrete and provide protection. If you have grease spots, it may enhance their color or darken your concrete as a whole. They make the concrete stronger and harder and can easily be sprayed through a sprayer.
Each of these protects a variety of ways and prolongs the life of your concrete. They help it maintain a great finished look that is much more easily cleaned than the actual concrete itself.
When choosing a sealer, make sure you get enough for the surface you plan to seal. If your concrete is very porous, you may need more than suggested.
While choosing the type of sealer is important, you can also choose the gloss level. Do you want it to be shiny or stark? Depending upon the sealant chosen, the gloss factor will vary.
Penetrating sealers have almost no gloss because they get soaked in. Water-based sealers provide a medium amount of gloss and look like they have a matte finish. Finally, solvent-based sealers are of high gloss. They also tend to darken the shade of your concrete.
Also read: 11 Best Concrete Sealers (and a few mistakes to avoid)
2. Clear Concrete Of Debris and Dirt
Clearing the concrete before you seal it is important, but the more you clean it the better. Make sure all grills, pots, or other things are removed, and then sweep off the loose dirt and leaves. If possible, pressure washing the concrete to get all dirt and debris from the corners and pores will also be very helpful.
Also, remove all the previous stains with cleaners if necessary, stains are likely to be enhanced during the sealing process, so it is best to get rid of them before you begin. Stains can be removed with a concrete stain remover or home remedies, but be sure to let the concrete dry before you proceed.
Read more: How to Clean Absolutely Any Stain Off Concrete
3. Remove Old Sealer
Putting a new sealer on top of an old sealer is not a great idea. This leads to improper adhesion and can lead to more cracking and problems.
Often, people are not sure whether or not their concrete has previously been sealed. A great way to tell is to dump water on the concrete, if it soaks in, it is likely the concrete has not been sealed. If sealed, the water will bubble on top of the concrete and not soak in.
Because penetrating sealers change the chemical make up of the concrete, they do not ever need to be reapplied. Topcoat sealers will decay over time and need to be replaced after a while.
Acid etching is a great way to rid of the old sealer. All that is needed is to spray the concrete with diluted muriatic acid and scrub it around for a while. Finally, rinse the acid off and allow it to dry completely before the next step.
4. Fill All Cracks
Filling in cracks is important, not only for the look of your concrete but so the sealant doesn’t pool up in the crack. Simply, cracks can just be filled with a caulk, smoothed over, and allowed to dry.
Check out our post about the best concrete crack fillers for driveways!
If you are looking to enhance the appearance and durability of the concrete though, it may be a good idea to chip off all loose edges of the concrete, and chip it slightly more making it a bigger crack and filling that in with caulk. Smoothing the caulk over the edges of the slab will help blend the color and texture.
Caulk takes about 20 to 40 minutes to harden on the top, but an hour or 2 to dry completely. Give it time to dry before you apply sealant.
For cracks that are more than 1/2 an inch deep, it may be helpful to add in a foam compression backer rod. Then you will add the caulk around it and the sealant on top. Allow there to be 1/8 of open crack to fill with caulk and sealant.
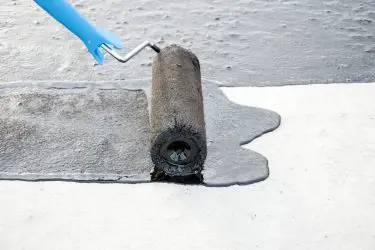
5. Apply A Thin Coat Of Sealer
Before you start sealing, be sure to be equipped with protective gear. It can be dangerous to get sealer in your eyes and on your skin. Gloves and glasses will be most helpful. Opening windows if you are indoors will also be helpful, as the smell is potent. Before you start, also be sure the weather is sunny and not raining. The optimal temperature is between 50 and 90 degrees Fahrenheit.
Prepare whatever sealer you have chosen according to the instructions on its packaging. Most commonly, you will roll on the sealer with paint rollers, or spray it with a sprayer.
Applying a thin coat first will help it soak in if it’s a penetrating sealant. Be sure to wait for it to dry before applying the second coat. Read all the directions for usage and amount.
6. Apply A Second Coat
Going in the opposite direction as the first time you sprayed or rolled it, apply a second coat of sealant. Be sure to apply the sealer evenly, starting in a corner and working your way up and down the room.
Depending upon the instructions of your sealer, you may need to wait 2 hours to apply the second coat, or as quickly as 10 minutes. (Not all sealants require a second coat!)
Don’t step on the concrete while applying or drying!
Thin coats during the first and second coats are important because this ensures the sealant does not pool up and create uneven areas.
7. Allow Time To Dry
There are multiples times throughout the process that it is important to let the concrete dry. In the beginning, after you have pressure washed or scrubbed the concrete, a day or two of drying is necessary to ensure the concrete is not holding on to any moisture.
Any moisture still within the concrete will be trapped there once the sealant is laid, which can be the cause of cracks and other problems.
Another critical time for drying is after you have completed the process and the sealant is in place. This drying could take up to 3 days. Usually, epoxy and acrylic sealers take about 48 hours to fully cure, while a penetrating sealer will only take 8 hours. When in doubt, give it more time. After 3 days, normal foot traffic will be fine on most surfaces.
If you laid a fresh slab of concrete and are wanting to seal it, be sure to wait the whole 28 days of curing before you try to seal it. Sealing it too close to its pour will interrupt the process and increase the number of cracks. Once the concrete has cured completely, the sealing process can occur.
Why Seal Concrete?
Concrete needs to be sealed because it aids in the life, durability, and appearance of your concrete. Though that may be reason enough, there are additional reasons that concrete should be sealed. Sealers help to reduce the chance of freeze-thaw damage. It protects the concrete from retaining water, that freezes and expands, causing the concrete to crack and deteriorate. The sealant keeps water off the concrete surface.
Stains are also a major problem on concrete, whether it’s oil from your car, fertilizer from the yard, or another occasional accident, sealant helps the concrete not to absorb the harmful chemicals that break down components of the concrete and cause concrete discoloration.
A sealant can also be great for slanted driveways, because of its great grip. Around swimming pools, it is also of great help! It keeps the water out, and the slipping minimal.
Read more: Do You Need to Seal the Concrete Around a Pool?
In short, sealants keep all your concrete in top condition.