Stucco has long been used in construction as a coating for a building’s exterior, walls, ceiling, and sculptural materials in architecture. The material is made of aggregates, a binder, and water and applied wet before it hardens into a very dense solid. Due to its durability, attractiveness, and weather-resistance, many people stucco their masonry, brick, or concrete walls — you can do it on your own, too.
To stucco a concrete wall, clean the wall first if the wall doesn’t absorb any water or if the wall surface is contaminated, and moisturize it. Then, you want to mix, apply, and mark the scratch layer before applying the brown coat. The final layer can be a pigment or color.
In this article, you will learn the following:
- What stucco is and why you should stucco your concrete wall
- Different types of stucco
- Steps on how to stucco a concrete wall
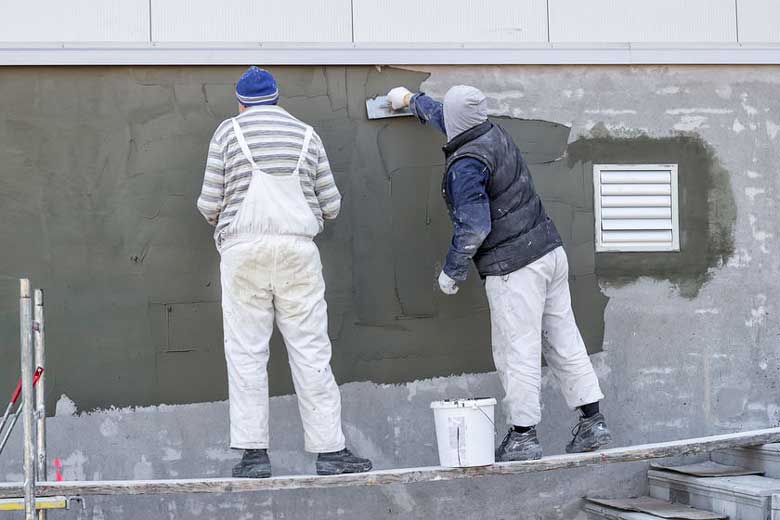
Table of Contents
What Is Stucco?
Portland Cement Plaster (stucco) is a construction material widely used on indoor and outdoor building surfaces. Despite its low cost, stucco is durable, doesn’t rot quickly, and can resist fungus well.
Plus, the material does not require much maintenance, making it a popular exterior material choice for DIY projects.
Traditional stucco is made from lime, sand, and water. The modern stucco we have today is made of Portland cement materials, sand, and water.
All the materials mentioned are mixed to create a plaster that can be spread on walls, ceilings, or other structures, to make a smooth, hard surface once hardened and dried.
Usually, it would take a professional to help you stucco your wall, but you can also do it yourself with the right techniques. You can use stucco on concrete wall systems or a frame structure.
Stucco is typically used to cover concrete, cinder block, adobe, or clay brick.
Advantages of Stucco
There are several benefits of using stucco. One of the advantages is you can save on construction costs and still achieve a strong and durable finish. The material is versatile as it is suitable for various climates.
Other benefits include:
- Fire-resistant
- Available in various pigments
- Color retentive
Disadvantages of Stucco
While stucco is an excellent product for giving your building a makeover, it does have its weaknesses.
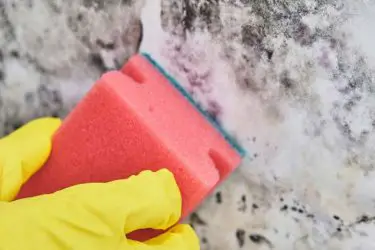
For example, stucco is porous, which means it is not waterproof, so water can penetrate the material slowly, causing the stucco to crumble eventually. An extended period of water exposure can also damage the home frame in the future.
On the bright side, homeowners can tackle the water problem by finishing the home areas that mostly come in contact with moisture. That way, the stucco can survive the wet seasons.
Homeowners can add finishing to the bottom footing or the top of their home using a different material instead, like brick or vinyl.
Another downside of stucco is that it’s challenging to repair. People who live in moist or snowy climates have to fix their stucco buildings frequently.
Since stucco involves multiple layers, you have to get all those layers fixed, which can be very time-consuming and expensive.
Different Types of Stucco
You can find two main types of stucco: traditional and synthetic. Whether you use a traditional stucco or synthetic stucco, your home will look great.
Both traditional and synthetic stucco have their strengths and weaknesses, which we will discuss shortly.
Traditional Stucco
Unlike today’s stucco, mixed with cement, traditional stucco is made of lime, sand, and water.
Having cement in the stucco is useful for adding more durability. Lime, however, only encourages mold growth, which is why it is not always favored.
Sometimes, traditional stucco has glass fibers and acrylics to achieve more durability. With pure hard cement stucco, a stable mesh base must be present to prevent stucco from cracking.
Stucco can last about 50 years if applied carefully and given proper maintenance.
Synthetic Stucco
Synthetic stucco uses acrylic resin instead of cement and lime. Synthetic stucco is water and damage resistant, which gives it an advantage over its traditional counterpart.
Working with synthetic stucco is also easy since it dries evenly and quickly.
You can apply synthetic stucco over foam board rather than mesh. Today, many construction projects use foam board because the material is super lightweight, easy to cut (using a utility knife), and waterproof.
The acrylic resin also enables the stucco to move, making it more durable and reducing the risk of stucco cracking and breaking.
Is Stucco Easy To Work With?
Stucco is easy to work with, so you can stucco your concrete wall on your own if you like.
You must stucco your wall carefully to ensure you’re getting the best, long-lasting results. We’ll show you how it’s done.
You’ll need to apply stucco twice on your concrete wall — make sure your wall is clean. Before you start your DIY project, you need to check the building codes for wall assembly and moisture barrier requirements in your area.
When using water-resistant stucco walls, you need to use water-vapor permeable Grade D building paper over the wall’s sheiling — use two layers.
Other important things to have before applying your base coat stucco:
- Plywood
- OSB
- Concrete board
- Exterior gypsum board
How To Stucco a Concrete Wall – Step by Step Guide
1. Prepare the Wall
You need to prepare the wall in two cases: when it has surface contamination and when the wall doesn’t absorb moisture at all.
Ensure there are no major cracks or holes in the wall and if there are any significant damages, repair them by applying a layer of skim coat.
Another important thing is to clean the surface and remove any paint, dirt, efflorescence, mold, or contaminants preventing bonding.
For most cases, a power washer is enough to clean the contaminants with water pressure. Depending on the situation, you could also try acid etching to prepare the surface of the concrete and make it more porous to accept the stucco better.
Related article: 11 Best Ways To Clean Concrete Basement Walls
2. Apply Adhesive
To improve the bonding, apply a layer of bonding agent on the concrete. Here again, choosing the right bonding agent and mixing it according to the manufacturer’s recommendations is key in achieving the perfect result.
Some manufacturers require you to wait for 24 hours for the bonding agent to cure or determine how many layers or inches of coat you need to apply. In addition, the type of stucco you use also determines which bonding agent to use. And some of them even don’t need any.
So, it’s better to ask the store which bonding agent is perfect for the stucco you’ve chosen.
Another thing to consider is whether you use the stucco for outdoor or indoor applications, each requiring specific types of adhesives.
You can apply adhesive agents using a brush, spray, or roller, but they must be clean and dust-free.
3. Mist the Surface
After applying adhesive and making sure it’s dry, you need to moisturize the whole surface by spraying water over it.
This way, you ensure a stronger bond and prevent the wall from absorbing water from stucco and making it dry before it should.
But remember to mist the wall, not douse it.
When you moisten the wall, you can predict how strongly it’ll bond with stucco by observing how well it absorbs the water. If you see the water flowing down like you’re pouring water on waxed paper, it won’t bond well.
But if you see the wall absorbs the water, it shows the bonding will be effective. That’s because it’ll absorb water from the stucco and cement particles.
Related article: Why Does Concrete Absorb Water?
4. Prepare the Stucco Mix
You can use the QUIKRETE Base Coat Stucco (link to Amazon) for your concrete wall DIY project. The QUIKRETE base coat stucco is a pre-blended stucco that is easy to work with, perfect if you are using hands to apply your stucco. With QUIKRETE, you can achieve a strong bond.

Otherwise, achieving the perfect mixture of water, sand, and stucco is crucial in creating a perfect finish on the wall. The type and proportion of materials depend on the stucco you use and your location.
You should create a texture that remains on the trowel when applying it to the wall. This way, you can easily manipulate it and spread it across the surface without exerting much pressure.
Yet, it should be firm enough to stick to the surface and be consistent enough not to sag when you apply it.
You know the mixture’s consistency is correct when your stucco can easily sit 90° on the trowel.
If your stucco is too wet, that means the consistency is not right.
Stucco that’s mixed too wet will sink easily, whereas stucco that’s too dry won’t mix properly and take much longer to reach the proper consistency. Don’t add too much water at a time. Instead, add water throughout the mixing process until you get a perfect consistency.
You can mix your base coat stucco in a wheelbarrow. This method is easy and great for small DIY projects. You only need a few tools, such as a wheelbarrow, a hoe, a water hose, and a base coat like QUIKRETE.
Another way to mix your base coat is by using a bucket and a drill. This method is also perfect for small DIY projects. It would be best if you had a shovel to measure your sand and cement, which is not always easy.
Other tools you need for preparing your stucco with the bucket and drill method:
- Mixing drill
- 2-3 5-gallon (18.9-liter) buckets, depending on the area size you want to cover
- Mixing paddle
- Scale
- Water hose
- Basecoat
You can prepare your mix using a mixer. Use this method if your DIY project is medium or large. By using a reliable mixer, you can work on bigger jobs quicker, and it would help to get some friends or family members to help out, too.
5. Apply the Scratch Coat
The first coat you apply to the concrete wall is the scratch coat. It works like a primer that prepares the surface for the final coat, making it smoother and bond better.
Apply a thin layer, about ¼” (6.4mm) or ½” (12mm) using the trowel, and wait for it to dry slightly.
Then, create horizontal grooves 1/8” (3mm) thick on the surface using a slotted palette, keeping it perpendicular to the wall. These scratches make the next layer bond better.
Don’t scratch the surface too hard, or the stucco will come off.
Wait for the scratch surface to dry for two days and gently spray water on it to let it cure properly and prevent cracking and shrinkage. However, you should do the misting more frequently if you live in an area where moisture dries fast, such as windy or hot and dry weather.
6. Add the Brown Coat
Adding the brown coat is part of the three-coat stucco system not recommended for concrete. However, some contractors recommend it for added strength instead of the two-coat system that’s more budget-friendly.
One method of applying the brown coat is to wait for 4 to 5 hours after adding the scratch coat when it’s rigid enough to ensure it won’t crack.
By applying the brown coat at this time, the scratch coat absorbs the water from the brown coat, resulting in a stronger bond.
This method — called double-back — makes the layer thick, more porous, and less prone to drying prematurely.
The catch is that you should know when to add the brown coat, which is difficult, especially in cold weather.
No matter which method you use, add the brown coat with a darby, filling every hole or crack and forming a smooth surface.
When the thickness reaches ¾” (19.05mm), leave it to dry a little and then use a sponge masonry float to smooth out the surface.
Wait for 48 hours and mist once or twice a day, depending on the weather conditions.
7. Apply the Final Layer
The final layer is the thinnest layer that gives the whole surface a smooth, finished look. Prepare the final mix the same as the scratch coat, but you can add sand or pigment to give it your desired color.
Spread the mix over the surface using the trowel and make a 1/8” (3mm)-thick layer.
The final texture depends on your preferences: you could smooth it using a float or give it any texture that you prefer.
Wait for a few days for the final coat to cure, moistening and misting the surface as needed. The curing may take several weeks, depending on the weather conditions.
It would also help to protect the stucco from direct sunlight as it may lead it to dry prematurely and change its color.
Adding Color to Your Stucco Wall
The QUIKRETE finish coat stucco can be used to create decorative colors for concrete walls. There are two colors available: white and gray. You can combine the finish coat stucco with over 20 standard QUIKRETE and mortar colors of your choice.
Several textures can be achieved, depending on your preference, and require some practice, such as:
- Cat face
- Lace and skip
- Sand/float
- Dash
- Worm/swirl or putz
- Smooth
- Santa Barbara
- English
Textures such as heavy lace, light lace, dash, or sand/float are beautiful and easy to make, coupled with some practice. Apply about ⅛ inch (3.175 mm) of thick finish coat stucco, from the lower section of the wall all the way to the top. Use a whisk brush to apply your finish coat stucco to the wall.
If you want a heavier texture, you need to apply thin finish coat stucco evenly that also ensures you have the color spread out adequately. After applying the light application, apply another batch of stucco, this time heavier and uneven. Then, knock down the finish that’s about to harden using a trowel, creating a lace texture.
If you prefer a smooth texture, use a trowel or sponge float in a circular motion on the surface. It would be best to complete your project in a single application to prevent color inconsistency. You want to ensure the surface stays damp, so use fine water mist to keep it damp for several days.
Different Stucco Finishes
Earlier, we’ve mentioned the different stucco finishes you can use for your concrete wall, depending on your preference. All stucco finishes are beautiful, but you want to choose the type that suits your home best. Let’s discuss the finishes.
Cat Face
The cat face is ideal for homeowners who like large concrete areas to be smooth, with evenly placed rough patches. The rough patches are known as inclusions, and they may vary in size and shape.
You can achieve the cat face finish by using acrylic or traditional or synthetic stucco.
Lace and Skip
Commonly used on homes and commercial buildings, the lace and skip finish is rough, with imperfections that are easily hidden thanks to its texture.
You can create this finish using your hand or spraying it on the surface and then flattening it with a trowel. You need to apply two coats to create this look, a base coat and then the texture.
Sand/Float
Commonly used for commercial buildings, the sand or float finish is versatile and can be used on traditional and synthetic stucco with just a single coat.
Since it is quick and easy to do, it would be perfect for your first DIY stucco project. The sand or float comes in three different finishes: fine, medium, and coarse.
Dash
The dash can be sprayed onto homes in light, medium, or heavy volume, creating a unique look of its own.
You can apply this texture by hand if you’re working with smaller areas or by a hopper gun if you’re working on larger areas.
Ideal for homeowners concerned with cracking, the dash can be changed with 1-3 coats.
Worm/Swirl or Putz
Also known as the swirl or putz finish, the worm involves a trowel moving large aggregate pieces in stucco across the surface to create indents on the stucco surface.
The finish is not as popular as it once was, perhaps because it’s not easy to fix once it’s cracked. However, some modern homes today still use it, thanks to its unique texture.
Smooth
If you like your walls to be smooth, then the smooth texture will be perfect for you, but it is also one of the most challenging finishes to achieve.
The smooth texture is very popular because it can be easily colored and matched with a building’s aesthetics.
This texture also makes it very easy for people to use different colors to give their walls the “mottled” look.
Santa Barbara
Santa Barbara is perfect for people who want an adobe-style finish. It is only used in traditional stucco applications.
Fine sand particles are used to achieve the adobe look. You will get a beautiful smooth finish with this texture, but it is prone to visible cracking.
English Stucco
Even though the English texture isn’t popularly used in modern buildings, those who like to give their walls a romantic aged look will find this texture perfect.
You will still see buildings with this texture, mostly older buildings. If you want to use this texture, you must only use traditional stucco.
Final Thoughts
Stucco has long been used in construction as a coating for a building’s exterior, walls, ceiling, and sculptural materials in architecture. You only need a 2-coat system to stucco a concrete wall. QUIKRETE base coat stucco is perfect for the job.
You must prepare your stucco mixture correctly and follow all the steps required to stucco your concrete wall successfully.
There are various types of stucco to choose from, depending on your preference. You can color your wall by combining the QUIKRETE finish coat stucco with QUIKRETE the color you like.