Nowadays, using self-leveling concrete yourself at home is a doable DIY home-improvement project for those with some experience. In the last few years, self-leveling concrete has become even more readily available for self-use. However, it is essential to know what you are doing and follow the manufacturer’s instructions closely.
To use self-leveling concrete, sweep or vacuum the area to clear debris, prime it, mix the concrete with water in a bucket, clean up any drips, and wait for the concrete to dry (it takes about two hours or more). Don’t forget to wear gloves, protective eyewear, and a long-sleeve shirt for safety.
In this article, we’ll discuss:
- What self-leveling concrete is and how to use it
- The different kinds of self-leveling concrete
- When it’s okay to use this type of concrete (and when it’s not)
- Proper safety precautions to follow
- And more!

Table of Contents
What Is Self-Leveling Concrete?
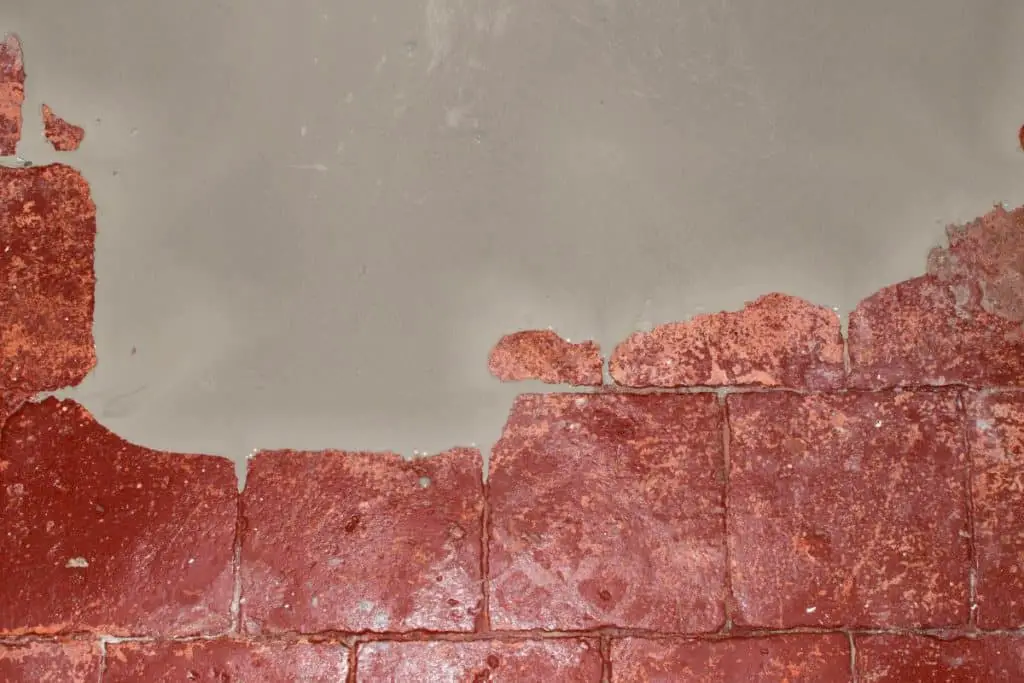
Self-leveling concrete is a highly viscous polymer-modified concrete. Because its consistency is somewhere between liquid and solid, you can pour it over the designated floor area with minimum effort while it runs into the corners and spreads all over the floor.
As the name already implies, the material levels itself out and is best for flattening your hard floors, like tile, concrete, and plywood.
Different Kinds of Self-Leveling Concrete
There are two kinds of self-leveling concrete out there. These are acrylic self-leveling concrete and water-based self-leveling concrete.
Let’s take a bit of a closer look at both of these.
Acrylic Self-Leveling Concrete
This compound consists of a mixture of acrylic liquid polymer and cement powder. This combination of these two materials results in a floor that is relatively elastic for concrete and is resistant to abrasions and scratches.
However, this type of self-leveling concrete takes longer to dry than the water-based kind.
Water-Based Self-Leveling
The consistency of a water-based self-leveling compound is more like regular concrete because water is its lubricant. As I said in the previous paragraph, this compound dries fast; it can even dry in as little as twenty minutes.
The water-based self-leveling compound is mainly purchased in powder form and mixed with water (later on), creating the concrete.
When To Use Self-Leveling Concrete
If you are looking to renovate your flooring, you must first level out the underlying floor. If you’re not sure if this is the case or you know for a fact it isn’t, you can level your underlying floor with self-leveling concrete.
You don’t have to be an expert, but it will come in handy if you are a DIY-enthusiast or at least don’t have two left hands. It’s a good idea if you’re looking to finish your project on a budget.
Additionally, using self-leveling concrete can also be great for repairing, raising, or leveling a floor. Self-leveling concrete works well underneath the carpet, tile, or other floor types.
When Not To Use Self-Leveling Concrete
By now, you know all about self-leveling concrete and when it makes sense to use it. However, here are some instances where you shouldn’t use self-leveling concrete:
- On surfaces with an incline of more than 0.5 inches (1.27 cm)
- Outdoors
- If there are issues with the underlying structure
- If you have an old house
- If you feel like you aren’t very handy when it comes to home-improvements
When in doubt, call a professional to look at your home and do the job for you.
How To Use Self-Leveling Concrete Step-by-Step
1. Self-Leveling Concrete Safety Precautions
As long as you consider the safety measures, self-leveling concrete is a safe DIY project. In recent years, self-leveling concrete has improved a lot, and it’s now safer and easier to use than before.
If you keep the following strategies in mind, you should always be protected:
- Wear protective eye gear such as safety goggles to prevent any concrete from getting into your eyes. In the unlikely case that this does happen, clean your eyes with water and seek medical attention.
- Wear protective gear for your hands, a shirt with long sleeves, and pants that cover your entire legs. If your skin comes into contact with the concrete, it can be harmful or damaging. Wash it off as soon as possible after exposure.
- Inhaling some self-leveling concrete can be irritating to the lungs. If you do start coughing or sneezing, leave the space. A face mask might be a good idea.
2. Get a Mixing Drill, Broom, Primer, & Self-Leveler
Before you dive in and start mixing the concrete, you will need to get a few things first! To get the job done, make sure you have the following:
- Vacuum, mop, and broom
- A big barrel or bucket to mix the water and cement (minimum six-gallons)
- A Mixing drill with a mixing head
- Cleats
- Kraft paper or a plastic sheet
- Gauge rake
- Silicone caulk
- The self-leveler and correct primer
3. Sweep or Vacuum the Surface To Remove Debris
So, first things first: you need to prepare. After you’ve purchased the material, it’s time to get to work. Clear the surface of any debris, dust, or grime before doing anything else. Otherwise, the compound won’t stick well to the subfloor.
Make sure to clean the entire space by thoroughly sweeping and vacuuming.
Also, check for any joints or substantial cracks on the surface. Although the self-leveling concrete will cover it, it won’t do anything to correct them.
Ensure that the (sub)floor isn’t overexposed to moisture since this will eventually degrade the leveling compound.
4. Prime the Surface
Though some self-leveling concrete will come with a primer, most don’t. The floor will still need some priming, though, so you will have to make sure you’ve bought a primer yourself.
The primer should go well with the self-leveling concrete as well as the type of floor you are installing it on.
You can generally find the information in the instructions that come with the self-leveling concrete.
5. Mix the Concrete Mix With Water in a Large Bucket
After dealing with the primer, it’s time to move on to mixing your self-leveling concrete with water (when applicable). If you’re using water-based self-leveling concrete, this is a necessary step.
Grab a large bucket and put in the amount of water recommended for the compound (check the bag). Gradually add the powder to mix it with the water.
Mix the two until its consistency is highly viscous and seems much like thick paint. You can use a cement-mixing paddle that’s powered by a strong drill to speed up this process.
Don’t stop mixing until you’re all set to pour it because if you stop, it will set.
6. Pour the Mixture Evenly, Starting in One Corner
When the mixture reaches the desired consistency, put the drill down and pour the mixture onto the prepared floor. Make sure you pour it at an even but quick pace.
It’s best to start in one corner and move your way towards another corner (preferably where the exit is, so you don’t get stuck).
Self-leveling concrete should typically spread evenly when it’s thick enough, but unfortunately, this isn’t always what happens.
If it doesn’t spread evenly on its own, use a trowel to distribute the compound into areas that aren’t evenly covered.
Read more: How Thick Can You Make Self-Leveling Concrete?
7. Clean Up Splashes Within Ten Minutes
If there are any accidental splashes or drips, clean this up right away! Once the compound has set, it can be hard to remove. The same goes for any tools you’ve used.
The concrete will set anywhere between ten minutes and two hours, so the clean-up should also be done as quickly as you can.
8. Allow the Poured Concrete to Dry for 2+ Hours
After the clean-up is done, it is time to wait until the concrete has completely set. As I mentioned, this can take up to two hours depending on which product you are using and the conditions you are working in.
Ensure that nothing touches the floor in this timeframe; otherwise, it might leave a print.
Follow the instruction that comes with the self-leveling concrete you are using since they are likely more specifically altered based on the product.
Tips for Using Self-Leveling Concrete
Here are some important tips to keep in mind before (and while) you are going to use self-leveling concrete:
- Get your supplies ready. Get all of the supplies you’ll need set-up so that when you need them, they’re just one grab away. You won’t have time to run to the garage or whatsoever because the concrete sets so fast.
- Be quick. After reading the instructions about using self-leveling concrete, you’ll realize that time is of the essence. This all has to be done before the compound sets (so within ten to twenty minutes). So, I can’t stress enough how important it is to work fast.
- Don’t add more water. After you mix the powder and water and start pouring, you can’t add any more water. The mix ratio is crucial!
- Think temperature. The temperature of the space/room you are using and mixing the self-leveling concrete in has a big effect on the time the concrete sets. The ideal temperature is somewhere between 65°F and 80°F (18.33°C and 26.67°C). Do not mix the product in extreme cold or heat, and don’t do it outside.
- Buy more products. Remember that you have to finish the job in one single pour, so if it turns out you don’t have enough, you’re on your own. Buy a little more than you need, and you should be good to go. Be warned not to pour more product than you’ll need, though!
- Follow instructions. Follow the manufacturer’s instructions at all times. If they contradict any steps I’ve mentioned: follow whatever the manufacturer is saying you should do.
- Gaps. The good news is that self-leveling concrete can help to fill gaps. However, don’t use it on subfloors with an incline of more than 0.5%; this will impair the way the concrete disperses.
The 5 Best Self-Leveling Concrete Products
If you’ve decided that you’re going to go for it, you might wonder which self-leveling concrete to choose and why. Here are the top five products worth trying:
Best Overall Floor Leveling Compound: Akona
For: Only interior application, good for radiant floor heating installations
Akona’s self-leveling product is water-based, and you will have to mix it yourself by adding the water (nothing else). This compound can be applied as thick as ⅛ of an inch (0.32 cm) to one inch (2.54 cm). After only 24 hours, you can put it on the end floor on top of the surface.
Akona’s self-leveling concrete can protect tubes and cables and also help evenly distribute heat. After about ten to twenty minutes after laying the compound down, it will be set.
If you purchase one bag (50 pounds or 22.68 kg), it should be enough for 50 square feet (4.65 square meters) when it’s poured at ⅛ (0.32 cm) thickness.
Best Acrylic Concrete Floor Leveler: Sikafloor Self-Leveling Sealant
For: Can be laid extra thin
Sikafloor’s self-leveling compound is not water-based, so you won’t have to do any mixing yourself. It comes both in a standard version and a latex one if you want an extra supply surface. This self-leveling concrete can be applied thinner than any of the other four options. It can spread as thin as 1/25 inch (0.1 cm) or as thick as 1 ½ inch (3.81 cm), to your preference.
For this product to set, you will have to wait a little longer: around two hours. You can walk on it after around four hours pass.
Just as Akona’s product, a 50-pound (22.68-kg) bag will be enough for 50 square feet (4.65 square meters) at ⅛ inch (0.32 cm). It is worth noting that the primer has to be put separately on the floor before pouring the mixture.
Best Leveler for Thickness: Henry Premixed Floor Patch
For: Underlying structures with deeper crevices
Henry’s water-based self-leveling concrete is in powder-form. All you must do is mix it with water, pour, then spread it. It dries very fast, and you can put the top floor on after about six hours when it is ceramic tile, about 16 hours with other flooring types. Because this product can be laid on up to five inches (12.7 cm) thick, it is ideal for underlying structures with deeper crevices.
A primer should be put down before the mixture goes on top (unlike Akona’s product); this primer should be purchased separately but is also offered by Henry. A 40-pound (18.14-kg) bag will be enough to fill 44 square feet (4.09 square meters) at ⅛ inch (0.32 cm) thickness. After about 30 minutes, you can expect this product to be set, depending on your working conditions.
Best Leveler for Final Surface: LevelQuick Self-Leveling Underlayment
For: When you want this surface to be the final floor surface
LevelQuick’s self-leveling concrete is another water-based product. It comes in powder form as well and only needs to be mixed with water. This product is made to be poured in one go, and it can be applied as thick as 1 ½ inch (3.81 cm). LevelQuick’s compound is also very fit to be the final floor surface and is ideal for places, such as breweries, kitchens, and flood plants. After about twenty minutes, you can expect it to set.
The floor should be prepared by applying a primer before adding the compound. A standard bag is 50 pounds (22.68 kg).
Best Value for Money: Mapei Self-Leveling Underlayment
For: Indoor floors
Another water-based self-leveler requires an additionally purchased primer which has to be applied previously to the compound mix.
This product is meant for indoor flooring and can be laid from ⅛ inch to 1 inch (0.32 cm to 2.54 cm) thick. The product will set between ten to fifteen minutes. After 24 hours, ceramic tiles can be applied on top, and other floorings can be installed after 48 hours. A 50-pound (22.68-kg) bag will be enough to fill 48 square feet (4.46 square meters) at ⅛ (0.32 cm) thickness.
8 Benefits of Using Self-Leveling Concrete
There are several benefits to using self-leveling concrete as opposed to calling up a professional to level your floor with regular concrete. Your mind might automatically go to the money aspect of it, but there are other benefits. Many professionals actually often use self-leveling concrete themselves. Let’s get into the specifics.
- When you use self-leveling concrete, it creates a very smooth and strong surface. This not only makes it ideal as the underlying structure for other floorings, but it is also strong and smooth enough to serve as a floor on its own. You can use it for gazebos, canopy tents, and seating arrangements.
- Self-leveling concrete can obviously be used for leveling concrete, but it can also be put on top of any surface that isn’t flexible, such as LVP, wood, plywood, or ceramic tile. If you’re tired of an old appearance or weakened boards, self-leveling concrete can make it better instantly.
- Even if you’re not a professional or even experienced DIY home improvement type, you can easily use self-leveling concrete to level your floor since it is so easy to use. Aside from a few tools, you don’t need loads of experience or heavy machinery. This reason is why it was propelled to the top of the list for many DIY installers.
- Using self-leveling concrete will result in a structure that is even stronger than regular concrete, which makes it ideal for reinforced concrete construction. Whether you’re patching old concrete or increasing the durability of a new layer, self-leveling concrete is worth a consideration.
- If you are prone to allergic reactions, you don’t have to worry about self-leveling concrete. Regular concrete, however, can actually cause a chromium allergy with workers, which can result in highly undesirable occupational asthma. Steer clear of allergens by using this high-quality formula.
- Self-leveling concrete is more immune to the growth of mold in wet conditions than conventional concrete. Mold, mildew, and bacteria can rot and weaken concrete, but not the self-leveling variants. Not only will you preserve the flooring, but you’ll also keep your guests and family safe.
- Because self-leveling concrete dries extremely fast, you will have to wait less time to move onto any next steps you have lined up. There are far fewer risks of anyone accidentally leaving a footprint on your work. It’s an excellent way to breeze through a DIY installation on a weekend.
- Using self-leveling concrete yourself and not hiring a professional will save you money. Labor costs can skyrocket the price tag. If you can do it without any expert help, you’ll be happy with the results.
Disadvantages of Using Self-Leveling Concrete
So far, you might be thinking: what could go wrong if self-leveling concrete is so easy to use? Although it is easier to use than traditional concrete, this, unfortunately, does not mean that nothing can go wrong. Running into challenges is something that most DIY projects come along with, so it is no reason to get discouraged; it is simply important to be mindful and attentive!
Let’s take a looks at some of the challenges you might phase and how to avoid any issues.
Time
Self-leveling concrete dries very fast, so you will have to work fast! How fast it dries depends on the conditions you are working in and the product you are using. You may even have as little as twenty minutes to mix, pour, and finish the entire surface. This means small mistakes will catch up to you quickly.
Sticky
The self-leveling concrete material is quite sticky, and it can stick firmly to any tools you’re using or other surfaces that it comes in contact with. Cleaning your tools as fast as you can afterward is the only way to get them clean, and if you spill anything on a surface where it is not supposed to be: clean it immediately! If you don’t, they may develop a permanent stain.
Underlying Structure
The self-leveling concrete will not reinforce the structure below. This means that if anything goes wrong with this underlying structure, the self-leveling concrete can become loose or break up. This, in turn, can result in damage to anything put atop the self-leveling concrete layer. If your top floor is ceramic tiles, for example, these could actually break.
Challenging
Another disadvantage of using self-leveling concrete yourself is that it can be quite challenging. If you make a mistake, it can be very hard to undo and very costly since you will probably have to get a professional to come in and fix it. If you are not 100% sure that you will be up for the task: don’t do it. In this case, it is best to let a professional do it right at once than being stuck with the broken pieces yourself later on.
The best piece of advice would be to take it slow and work step-by-step. Even if you’ve worked with traditional concrete, you might run into a few problems. Self-leveling concrete settles quickly, so there’s a bigger margin for error. Take your time and follow the necessary steps to achieve your desired results.
Frequently Asked Questions
If you’ve chosen your favorite self-leveling products or you have a few additional questions, you’re in the right place. While the name might make it seem simple, there are a few techniques you’ll have to apply to succeed. We’ll cover everything you need to know in a series of questions below.
- How thick can you level the concrete? This depends on which product you are using, but generally, the thickness can be between ⅛ inch (0.32 cm) to one inch (2.54 cm). There are products on the market, though, that can be laid thicker (up to 5 inches or 12.7 cm), such as the Henry self-leveler.
- Do I always need to use a primer? You don’t always have to use a primer, although it is most likely that you do. Most self-leveling products have to be bought separately from the primer that goes along with them. Always follow the manufacturer’s instructions; they also often advise which primer goes best with their product.
- Is it possible to add another layer of self-leveling concrete? Yes, this is possible. You can add another layer of the concrete when the first layer is completely dry and set. How long this takes exactly depends on the product you are using, the manufacturer will mention this in their instructions. Once it is dry, you can add the primer again (if applicable) and then the next concrete layer.
Final Thoughts
Using self-leveling concrete can be a perfect option for many people when they want to renovate their floor(s) and need to level out their underlying structure. It is less costly than hiring a professional, it is a quick job, and nearly anyone can do it. However, that’s only true if you follow the manufacturer’s instructions and abide by the proper safety guidelines.


