A concrete slab is valuable in construction as it can serve a myriad of purposes ranging from carrying foot traffic to holding parked or moving vehicles. However, the pouring process can be tasking—especially if you intend to go the DIY route.
To pour a concrete slab without professional help, you need to gather the right tools necessary for the job and secure any necessary permits. You’ll also need to know the soil type as different ones have varying relationships with concrete, and you may need to hire a concrete truck for the job.
If you’re new to pouring a concrete slab, the task may seem too difficult as a single mistake can cost you thousands to rectify. This guide makes the process less daunting, making it easy for anyone to complete their first concrete slab. We’ll look at the tools you need for the job and the right pouring techniques for the best results.
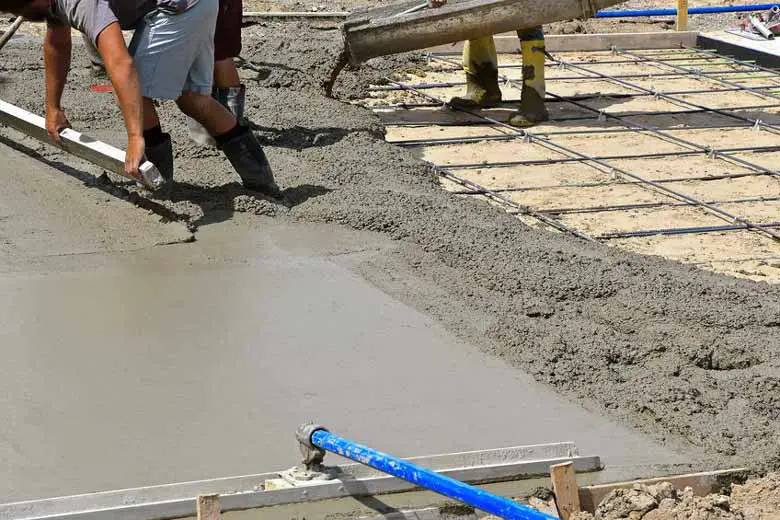
Table of Contents
Do You Need Previous Experience To Pour a Concrete Slab?
With the right guidance, almost anyone can pour a concrete slab. You don’t need previous concrete handling experience, but you need some basic DIY skills to get through the project.
It also won’t hurt to have a more experienced person around to help you.
If you’ll do the job alone, it’s a good idea to start with a small slab before you pour a more expensive and more demanding one.
How Much Time Will the Project Take?
You can complete the actual concrete pouring process in less than half an hour, but preparing the site and waiting for the slab to cure can take the time required for the whole project to a week or more.
Form building and excavation typically take the bulk of the time when you’re pouring a DIY concrete slab.
Hire an excavator to help level the site if sloped to save time. After the site is sloped and you’ve brought in some fill, you can spend the next day building forms. With the form built, you can pour the slab the next day.
What Is the Cost of Pouring a Concrete Slab?
You should expect to pay a contractor between $1500 and $3000 for a 16 x 20 ft (4.9 x 6.1 m) slab. This will cover the tools and labor.
Using that estimate, you can expect to spend around half that sum or lower if you pour the concrete yourself.
The cost of pouring a concrete slab will depend on a variety of factors, including the size of the area, the type of concrete mix you’ll use, the price of hiring an excavator (if you’ll need one), and other intangibles like your postcode and how it affects the price of materials.
In our concrete price guide, you can read more about the cost of concrete and price examples of several concrete projects.
How to Pour a Concrete Slab Step-by-Step
If you also want to see a great video explaining and showing every step, just keep reading and you find the video further down this post.
1. Gather the Tools and Materials Needed
Below are the tools and materials that you will need.
- Tape measure
- Safety glasses
- Pry bar
- Level
- Hammer
- Circular saw
- Tie wire
- Packable fill
- Forming lumber
- ½” (1.27-cm) Dia. rebar
- Duplex nails
- Concrete
- Anchor bolts
- 6-mil plastic
Take Safety Precautions
You should avoid getting wet concrete on your skin because it can cause several adverse reactions ranging from some mild discoloration of the skin and heavy scratching to third-degree burns that can leave permanent scars.
Here are a few things you can do to avoid such problems or worse:
- Wear rubber gloves.
- Wear tall rubber boots to ensure your legs are protected if you have to wade into the concrete while it’s wet.
- Wear long plastic coveralls that will protect your sleeves and legs. Wet cement can soak into normal clothes.
- Wear goggles to protect your eyes as splashes to the eyes can be very dangerous.
2. Get Permits
Depending on the scope of the project, you may need a permit before you can pour your concrete slab. Talk to your local building department to see what’s applicable in your case.
You should also confirm the infrastructure that is running beneath the ground you intend to use as the site for your slab. A radio detection tool can help here, but you can also use the 811 Service.
They can help confirm if any wires or pipes are buried within the area.
3. Prepare the Site
You can’t pour your concrete slab into an unprepared site. You need first to measure the lot line to ensure you’ll position the slab parallel to it.
The next step is to pin four stakes to the corners of the slab. This will help you to remember where the slab will be positioned.
With the slab position squared off, get some string and a line level to calculate the ground slope.
This is important because you should only pour your slab on a level base. If the ground isn’t level, the poured concrete slab will crack or shift from the position after a while. The structural integrity won’t hold for long.
To level out the soil, you can move some soil into the lower end or dig into the higher side of the slope to bring it down to the right level.
You can also choose to build a concrete retaining wall to hold the soil in position. Choose the approach you’re most comfortable with.
4. Pay Attention to the Soil
As we mentioned above, the soil type can affect the concrete slab laying process. You need to watch the type of soil you’ve got in the area you intend to use.
Sandy soil works fine because there’s little risk of the slab cracking because of fluctuations in the water content of the ground around it.
However, the situation is different with loam or clay soil.
With these, you need to add some inches (usually 6-8) of compacted gravel underneath the concrete.
5. Build a Strong and Level Foundation
With the site for the concrete prepared, the next stage is to choose the boards for the project. You have to pay attention when making that decision as different board measurements work for different areas.
For example, you’ll need 2 x 6 boards for driveways with no thickened edges. On the other hand, 2 x 12 boards featuring 5-inch (12.7-cm) thick slabs work best when pouring concrete slabs for garages and sheds.
In cases where the length of the boards is inadequate for the job, you can combine boards of different sizes. You just need to align both boards to achieve flushness and then apply cleat across the joint. This way, the boards will stay aligned properly.
To get the right result, you have to ensure the sideboards are cut three inches (7.62 cm) longer than the concrete slab’s length.
Then, cut down the end boards, ensuring that they match the width of the slab.
Use some 17-inch (43.2-cm) double-headed nails to attach the bracing and connect the form boards. Complete this stage by driving the stakes into the forms using a hammer.
A note of warning for this stage: You should ensure you’re using very strong bracing so the boards won’t get pushed out of place after the concrete is poured. If you allow this to happen, your slab will end up with a curved edge that will be nearly impossible to fix without starting afresh or destroying a chunk of it.
To avoid this problem, give additional support to the board by placing 2 x 4 kickers and 2 x 4 steaks every 2 ft (61 cm) along the sides. The kickers will help keep the steaks from bending outward (and forming curved slabs).
Installing the boards involves stretching a mason’s line (or any strong string) along the form board’s top edge. It’s important to confirm that the braces are properly aligned with the string.
Then, tweak the braces to make sure the form boards stay straight. Next, cut down the stakes to ensure the top of the forms is just above the top of the stakes.
The next step here is to drive the kickers into the ground at an angle that allows you to nail them to the stakes.
If you’re working on sandy or loose soil, you have to square-off and cut the kickers, then make a small, thin steak to hold the kicker in place.
Once these are in place, add the third form board close to the first one. Place the fourth side after you tamped and hauled the fill.
To ensure perfect leveling for the form boards, you should leave one of them slightly higher as you hammer it to the stake. This allows you to adjust the level by tapping the stake gently into place using a hammer until you get to the level you want.
6. Build the Base Properly
To ensure you have a strong foundation for your concrete slab, you should ensure the base can allow water to drain away properly. When water isn’t absorbed, the result tends to be movement and cracks within the concrete slabs.
Rectifying this problem can cost lots of time and money. As we mentioned earlier, sandy soil is good at absorption, but if you’re working on other soil types like clay, you’ll have to add gravel to the base.
With the forms in place, you can accurately estimate how much fill you’ll need for the job. You can achieve this by measuring from the top of the forms to the ground using some string or tape.
Repeat the process four times to get an average fill estimate. The depth measurement will tell you how many cubic yards are necessary to achieve the right quantity of fill.
Crushed concrete can serve as your fill. It has decent absorption and draining properties.

When spreading the fill, make sure they don’t go beyond three inches (7.6 cm) of thickness. You should also tamp the layers using a plate compactor (which you can rent).
You need to ensure space for the thickened edge, so you have to leave a 12-inch (30.5-cm) deep and 12-inch (30.5-cm) wide trench while spreading the fill.
7. Reinforce the Concrete Slab
Most concrete slab projects require reinforcement with steel bars to reduce the risk of potential cracks and improve durability.
For small DIY jobs like this one, you can use steel reinforced bars for the reinforcement structure. Composite metal decking is the structure chosen in many commercial projects.
This part of the project is very labor-intensive and requires you to have some previous experience of the process. You should consider hiring a professional concrete contractor at this point. You can keep the cost down by supplying the bars yourself.

Don’t forget to buy a wire twisting tool and tie wires as they’re important for connecting the bars.
If you don’t hire a contractor and choose to cut the bars, you need to get a metal-cutting blade or similar tools that will allow you to accurately cut the bar into the right shape and size.
The next step is to bend the bars to get them to fit the perimeter.
To achieve this, follow these steps:
- Merge the bars.
- Secure them in place using some wire around the overlap.
- Overlap the bars by around 6-10 inches (15.2-25.4 cm).
- Wire the bars to the stakes for additional support.
- Cut the pieces and lay them out in a 4-ft (1.2-m) center-grid arrangement.
- Wire the intersections together to ensure you can pull the grid to the center when you pour the slab onto it.
8. Get Ready To Pour the Concrete
One of the first things you should do here is to consider the weather.
Concrete dries faster in hotter weather, so if you’re working under high temperatures, consider dividing the slab into two and filling one part on different days. Splitting your workload over a few days can help improve the quality of your job.
Don’t forget to remove the divider before you start to pour the second portion of the slab.
You’ll need a concrete truck to accurately pour the concrete into the right position for big concrete slab projects. You need to ensure you’ve squared off everything and are ready to go when the truck arrives to avoid delaying the pouring.
For proper pouring, you need to ensure that the concrete forms are square and level. They should also be able to withstand the force of concrete being poured.
You should also ensure adequate room for the truck to navigate when pouring the concrete in the right position. The best days to pour concrete are when the weather isn’t too hot or too cold. This way, you can avoid fast thawing or hardening.
To work out the volume of concrete you need, you just need to get the cubic feet measurement. This can be calculated with the formula: length x depth x width. To get a measurement in yards, you should divide the cubic feet total you’ve arrived at by 27 and then add another 5% to the total to arrive at a sum.
Get in touch with the concrete company you intend to work with a day ahead of time to discuss your needs. They’ll request details on the project and offer helpful advice that can speed up the project a great deal.
Working with a company to provide you with already mixed concrete is a more realistic method of handling this process.
However, you can choose to mix your concrete on your own by using ready-mix concrete. This is a blend of sand, cement, gravel, and other substances bagged and sold in most home improvement stores. All you need to do is add water when it’s time to use it.
Many people working on sizable projects choose to hire a company that can supply them with pre-mixed concrete for pouring to avoid the stress of working with packaged ready-mix concrete powder.
Read more: How to Mix Large Quantities of Concrete (On the cheap!)
9. Pour the Concrete
When the concrete truck comes in, ensure the concrete is poured into the furthest forms, giving it enough time to set. You also won’t have to move the truck back and forth.
You can also choose to pour the concrete into a wheelbarrow first and transport it to the slab site, but this is tricky. You need to ensure you can pour it quickly before it sets in the wheelbarrow. You may also lose some of the consistency.
As you pour the concrete, it’s important to ensure it’s as close to the final spot as possible and then smooth out and soften it with the aid of a square-headed shovel.
Avoid using a round shovel as it can leave marks on the surface. You should lift the rebar as you position it in the middle of the concrete slab while working.
After the concrete has been poured into the forms, smoothen it using a screed board. The process will be easier if you have someone else gently pushing the concrete in front of the screed board.
This way, you can ensure you’re smoothing out all the poured concrete into position. It’s not compulsory to move lots of concrete at once. You can make multiple passes with the board to ensure you’re working as efficiently as possible.

When you’re done with the screed board, it’s time to use the bull float. Bull floats are great for removing any marks left by the screeding process.
It’s also good at helping to fill out any missed gaps to give you a smooth and flat finish.
Pay attention while using the screed board or the bull float to avoid the risk of creating low spots of concrete that dip below the correct level. This can affect the structure of the slab.
Similarly, you should only pass the bull float over the surface of the slab no more than three or four times to avoid forcing too much water to the surface. This can impact the structural integrity negatively.
10. Apply Finishing Touches
After using a bull float on concrete, you’ll find water rising to the surface. This is perfectly okay, and you should avoid interfering here. It is an important part of the concrete hardening process.
After the concrete has hardened, you can apply finishing touches using a hand-float.
To check if the concrete is ready for the hand-floating stage, press a finger into a corner to ensure no print is left behind.
The next stage of the finishing process is grooving, but you should only get started on this when you’re sure the concrete can support your full weight. Avoid kneeling directly onto the concrete for this process. Use a kneeling board (link to Amazon) to ensure your weight is distributed appropriately across the surface.
Grooving is useful because it directs concrete shrinkage cracking, giving it an aesthetic appearance. The cracking that comes with concrete shrinkage is inevitable.
Without grooving, the cracks will appear randomly. The position of the grooves should come down to the size of the slabs and your project. However, you should generally cut in a groove for every 10 ft (3 m) of the slab.
When the grooving is done, the next step is to remove any imperfections caused by using the bull float and by edging. You can use a float for this, but for a really smoother and denser finish, you’ll also need to back it up with trowelling.
The trowelling process will get rid of every imperfection, but it’s a process only mostly seen in commercial applications. If your concrete slab project is sizable enough, you should consider including this step.
You have to create room for it in your budget as you’ll need to hire a professional for this job. There is a high possibility of damaging the slab’s surface if you select to do it on your own.
11. Wait for Curing
Once you’re done applying finishing touches to the poured slab, it is time to allow curing. You should keep the area moist so the concrete will reach maximum strength and cure properly. You can achieve this by spraying some curing compound on the concrete.
You can get the compound from your local DIY store. If you don’t want to use a curing compound, you can lay plastic over the surface of the slab. However, this can lead to discoloration.
The concrete needs to cure for 24 hours before it can take foot traffic. You should also allow a similar amount of time for the finished slab to harden overnight before removing the form boards.
If you intend to build on the slab, wait up to 48 hours to avoid scratching and chipping.
Remember that you’ll need to wait 28 days for your concrete slab to reach maximum strength. If you’ve built an open slab without any construction on it, you should keep it moist by hosing it down at least once a day—especially in hot temperatures.
Cracking happens when the concrete dries out too fast.
Here is a great video showing you how to pour a concrete slab yourself:
Tips for Maintaining a Concrete Slab
Below are a few tips for maintaining your concrete slab.
Use Concrete Sealers
Sealing your concrete slab is one of the best ways to extend its lifespan and also keep it looking great for as long as possible. Here’s a post about how to seal concrete in 7 easy steps.
There are a few types of concrete sealers you can get.
The topical sealers are designed for use on the surface every few years. They can help prevent stains and surface damage on the concrete.
To help you choose the right concrete sealer for your particular project, I have written a post about the best concrete sealers and what you should consider in order to avoid mistakes.
Always follow the manufacturer’s instructions if you intend to use any of these.
Keep Your Concrete Slab Clean
If you need to keep your concrete slab looking good for as long as possible, you should clean it from time to time. Cleaning the concrete will help you eliminate any accumulated dirt and debris, ensuring that the natural form of the concrete slab shines through unimpeded.
Be sure to only use cleaners made for concrete. Some household cleaners may cause problems on such surfaces. In my guide to the best concrete cleaners, I also explain the type of cleaner required for different types of stains.
Get Rid of Stains Quickly
Allow spills and stains to cake on the concrete slab can leave unsightly marks. In worst-cases, the stains and spills can cause chipping and ruin the structural integrity of the slab.
So, from leaked oil in the driveway to spilled paint, get rid of them as quickly as possible. You can use a palm sander with concrete sandpaper to get rid of stubborn stains that have dried into the surface.
Related article: How To Remove Oil Stains From a Concrete Driveway
Be Mindful of the Weight
Properly installed concrete slabs are durable, but they won’t hold more weight than they were designed for. If you’ve built a concrete slab for your car in the driveway, don’t park heavy vehicles or large machinery on it.
Only use the concrete slab as you originally intended to avoid destroying it. Damage to the slab can also trigger another chain of costly damages around the property.
Don’t Store Chemicals on the Slab
Be mindful of the type of chemicals you store on the slab. Fertilizers and deicers are known to eat through sealers and damage concrete. Even when you nip the damage in the bud, you could still see strong stains and discoloration.
Conclusion
Pouring a concrete slab the right way is a labor-intensive project that often requires collaboration, even when you’re going the DIY route. You’ll need an extra pair of hands to build forms and install reinforcement, and you may also need to work with a ready-mix concrete company.
However, the DIY process can save you a decent sum of money as you won’t have to pay a third party for labor. You should also be prepared to work quickly—bearing in mind that concrete can dry very fast.