If you are looking to set a post or build a fence yourself, there are many things to consider. One of the biggest hassles of putting a post in your yard is the concrete—it is a pain to mix and is annoying to clean up the tools after. But mixing concrete is a staple of using it for posts, so is there a way to set a post in concrete without the hassle of mixing it?
To set a post in concrete without mixing it, you can add quick-set concrete to the hole with the post in it and pour the right amount of water on top. It is essential to dig holes of the proper width and depth and line the bottom of the hole with gravel for a drainage system.
In the rest of this article, you will learn how to set a post in concrete without mixing the concrete first. We will also answer some common questions about quick-set concrete and some of the most reliable concrete brands for post-setting and long-term durability.

Table of Contents
Setting a Post in Concrete Without Mixing – Step by Step
Before we begin, the most important aspect of setting a post without mixing the concrete is getting the right type of concrete. With an ordinary concrete mix, you will have to mix it with water before pouring it.
However, with fast-setting concrete, it is possible to pour it directly into the post hole and just add water.

A fast-setting concrete, like the QUIKRETE Fast Setting Concrete Mix (link to Amazon), will allow the water to percolate through it and sets in 20-40 minutes. (Wait four hours to construct the fence or put heavy weight on the post.)
It is almost as strong as mixing concrete (although standard concrete sets up a bit firmer and can last longer).
This method is perfect for setting posts and fences without mixing the concrete before pouring it. It also avoids the mess and extra tools involved in traditionally mixing concrete and is especially useful to set a post quickly and easily.
Even though this method is more straightforward than traditional concrete, it is still vital to be careful and methodical as you plant your posts.
Once the concrete sets, the only way to adjust the posts is to start over, and you want to be sure that you do everything according to the instructions on the package.
There actually is an even easier and faster way of installing fence posts, which we will discuss further down after this step-by-step guide…
Now, let us begin the step-by-step guide to setting posts in concrete without mixing:
1. Measure the Post and Gather Cement & Water
Before you set the post, make sure that it is both straight and tall, especially if it is a wooden fence post. To do so, measure your desired fence height and add about one-third of that to your post.
Remember that if it is warped or bent, it will be hard to set it correctly or put crossbars between two for a fence.
Other tools you need are your cement, water, and a post holer. It is also helpful to have a level to ensure that the post is straight and something to bolster your post with.
Smaller pieces of wood work well while the concrete is setting, even if you have an assistant to hold your post straight while you pour the concrete.
2. Dig a Deep Hole (⅓ of the Pole Length)

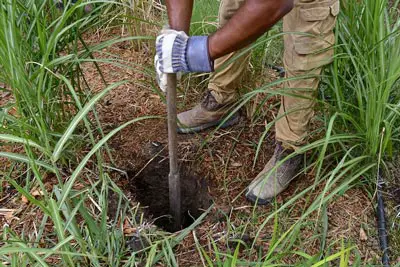
Dig the hole deep—about one-third of the length of the pole itself. Some residencies require at least a 30-inch (76.2 cm) deep hole for posts, so keep this in mind when measuring the height of your potential fence.
Don’t forget to remove any rocks or roots that might cause your post to tip when the concrete is poured.
Additionally, the post’s hole should be about two or three times as wide as the post itself. This will ensure enough support for the post within the concrete and prevent the post from getting too top-heavy or tipping over.
The concrete needs enough space to expand and surround the post without sacrificing stability.
3. Line the Bottom of the Hole With 6” of Gravel
Once you have dug the hole, the next step is adding a gravel layer to the bottom. This provides drainage for the hole itself and keeps the post from absorbing any groundwater.
Add at least six inches (15.24 cm) of rock to the bed and spread it around evenly. If you’re unsure where to start, pea gravel usually works well for this.
Once you are done with that, make sure to tamp down the gravel using the end of your post. This will prevent too much concrete mix from sifting down between the rocks and provide a tighter, more efficient drainage system.
It will also ensure that the gravel is spread evenly and won’t cause the set post to be crooked.
4. Set the Post in the Hole Straight & Centered
Once the gravel is down, you can finally set the post itself. Ensure that it is centered and straight in the hole. After all, once you pour the cement, there is no going back to shift the post’s position.
You can use a level to ensure that it is entirely straight. You can also brace the post with other wood pieces, so you do not have to hold it yourself until the concrete sets.
This is an extremely crucial step!
If you do not set the post perfectly the first time, you will have to take the entire concrete block out of the ground and set a brand new post from scratch. It is a huge waste of time and supplies and can be very frustrating.
That’s why you should double and triple check to make sure your post is straight before beginning to pour the cement.
5. Pour the Cement Until it Piles 3” Above Ground
Now that you are sure that your post is set straight in the hole, it is time to pour the concrete finally. Don’t forget to wear gloves and safety glasses—fast-act concrete is dusty and could damage your eyes or lungs should you inhale it.
It also helps to have a friend or helper hold the post steady while you pour to make sure it doesn’t tip or move before the concrete fills the hole.
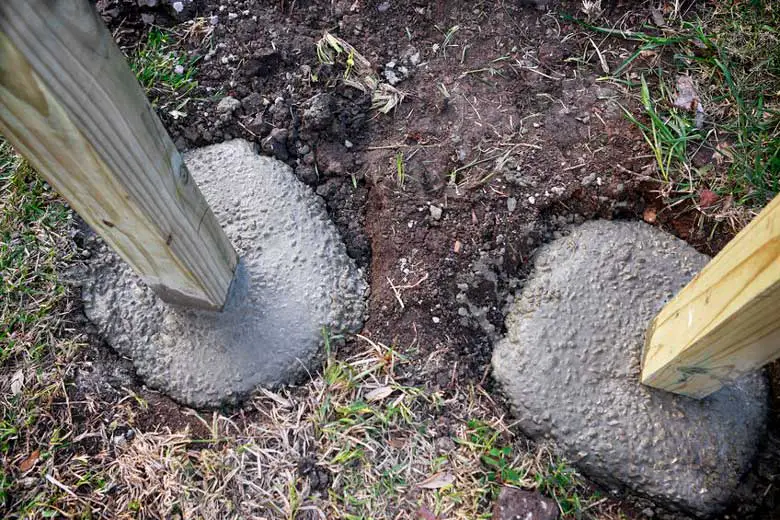
Pour enough concrete so that it piles about three inches (7.62 cm) above ground level (this amount varies, depending on the depth and width of the hole and the brand of concrete).
Also, make sure not to lift the post while you pour the concrete, or the post may not set properly and wind up looking crooked or uneven.
If the hole for your post is deeper than thirty inches (76.2 cm), it might be better to put half the concrete in before the water and then the other half after you pour some water. This will ensure that all of the concrete mixes well, and the bottom gets the same amount of water as the concrete at the top.
6. Add the Recommended Amount of Water
When the concrete is poured, it’s time to add the water. Follow the concrete package’s instructions to make sure that you pour enough water into the hole to set the cement, but not so much that it dissipates into the soil around the hole.
To allow the water to saturate entirely to the bottom, pour it slowly onto the concrete.
This is the final step where you can adjust the pole at all, so it’s vital to make sure that it’s straight now before moving ahead.
Immediately after you pour the water, level the pole for the last time before letting the concrete set. After this, whatever way the post sets in the concrete is final (unless you rip it out of the ground and start over completely).
7. Wait Four Hours for the Concrete To Harden
Even with fast-setting concrete, patience is vital. If you put any weight on the post or remove the braces before it’s set, the concrete will buckle, and your post won’t stay straight.
Wait the full four hours (or more if you’re using a slower brand), and don’t do anything to the post or cement until it’s wholly done setting.
If you want to make sure the cement is set, you can wait overnight to continue adding to your post.
Once the cement has completely hardened, you can remove the braces and add weight to the poles. Now, if you would like, you can add crossbars and weight or continue putting other posts in line for a fence.
That’s it! Pretty easy, right?
If you are more of a visual learner, here’s a quick video from Quikrete showing you how to do it:
Commonly Asked Questions About Setting a Post
Now that you know how to set a post in concrete, you might be wondering some other things. How do you make sure that posts are in line for a fence? If you live in an area that gets a lot of rain, do you need to do anything differently? Can you avoid using water at all and just pour the concrete in dry?
Here are some answers to common questions about setting a post:
What Is the Best Brand of Quick-Setting Concrete?
Not all quick-setting concrete is created equal. Some brands are significantly better than others, and it’s essential to fill your hole with quality concrete for maximum strength and durability.
Most of these brands are approximately the same cost and quality. There are a few that stand out from the crowd for strength and durability, however.
Before we discuss the real fast-setting concrete mixes out there, I’m going to recommend something a little different.
As I wrote in my article, ‘Best Concrete Mix for Fence Posts for Ultimate Strength‘, there is an excellent alternative to concrete when setting fence posts. The product is SIKA Postfix Fence Post Mix, which is available on Amazon.

It’s an expanding foam that is actually a better alternative than concrete for setting fence posts in a fast and easy way. It sets in as fast as 3 minutes! That’s crazy!
Just look at this (kind of corny) video and you will get a better understanding of how it works:
It’s very convenient, easy to use, and fast-setting, which makes it perfect even for beginners.
It isn’t as strong as regular concrete but it is totally strong enough for normal fence posts.
Check out some reviews and buy the Sika Post Fix Fence Post Mix on Amazon!
Back to the actual concrete…

The most popular quick-setting concrete on the market is the QUIKRETE Fast-Setting Concrete Mix (link to amazon)—it is lauded for its ease of mix and durability and the variety of products it offers.
Quikrete generally set hard in 20-40 minutes, and you can start applying heavy weight to your post after about 4 hours.
Sakrete Fast Setting Concrete Mix is another popular option for setting posts, especially as they offer a high-strength concrete mix. However, there are more negative reviews for Sakrete, claiming that the quick-setting concrete didn’t stay put as well as Quikrete.
Regardless, Sakrete is still an excellent choice for setting posts and fences.
Other brands, such as Hartline and Drylok, work about the same. They both have a mix of positive and negative reviews but get the job done and are useful when setting posts. Usually a bit cheaper, these brands can be easier to find in stores and are more cost-efficient. Whatever brand of concrete you end up using, it is crucial to follow the box’s instructions.
How to Set Fence Posts in a Straight Line?
If you are setting an entire fence and want the posts to be in line, start by setting the outer posts. If these are correctly leveled and are the same height, you should easily set the interior post in a straight line with a string and some nails.
Here are the steps to ensure that your fence is straight:
- Start by setting the outer posts at equal height. You could use a laser to measure the correct height.
- Hammer nails into the top of the opposite posts at equal heights.
- Tie one end of the string to one post, and pull it taut to the other.
- Dig holes along the straight line created by the string.
- Set your other fence posts at regular intervals, measuring to the height of the string.
- Level the posts and make sure that they are all the same height relative to the string.
- Once the whole fence has been set, take down the string and pull out the nails.
If you follow this method (and the procedure for setting the posts above), your fence should be straight and evenly placed.
This is especially important if you are installing crossbeams on a fence—it will be much more difficult to attach them if the posts aren’t in line with each other or at the same level.
Is It Different for Metal Posts?
The main difference between wooden and metal posts is that you have to check for warping with wooden posts. You can put metal posts in much the same way as wooden—you still have to dig a hole one-third of the pole’s length and three times the width and make sure that the pole is straight in the hole.
Metal poles are often used for lighter-weight fences, hammocks, and tented structures (without much weight on them).
They might be a little easier to install than wooden posts are, but they will not hold the same amount of weight and are more challenging to build on. Whether you use metal or wooden posts depends on what you are using them for—the setting process is precisely the same either way.
What if You Get a Lot of Rain?
If you live in an area with a lot of rain, you might want to add some extra concrete to the top of your post hole. This will prevent wooden fence posts from absorbing too much rainwater and expanding or rotting. The rain will divert into the ground around the pole instead of being soaked up into the wood.
To do this, simply mix a little of the extra concrete from the post hole and mound it around the pole’s base. Let it dry, and repeat the process with the other posts you are setting. This is a simple but effective method of keeping your wooden posts healthy for longer (even if they’ve been cured).
Can You Set a Post Without Water?
Some sources say that it is possible to pour dry concrete into the ground and not top it off with water, relying on the soil’s moisture or rainwater to complete the job. While this can work sometimes, it is not recommended in general or with larger fence posts.
It’s easier and safer just to mix the right amount of water into the concrete once you’ve poured it.
This is because the water you pour in yourself is carefully measured and follows the concrete bag’s instructions. Rainwater is unreliable and may not mix in the concrete properly or provide enough moisture. So, while this method might occasionally work, it’s not safe enough to try often.
Should You Use Wedge Anchors?
If you’ve done some research on post setting for various uses (ranging between a deck, fence, pergola, or hammock stand), you might have come across the idea of using wedge anchors to add further strength to your post.

Wedge anchors are metal pieces inserted into pre-poured concrete for extra durability in your post.
Related article: This Is How Concrete Anchors Work
As a short answer, you don’t need a wedge anchor for most of the reasons you set a post.
You also wouldn’t be able to use a wedge anchor with the fast-concrete post setting method because the wedge anchor must go in the concrete at least a month after it’s set and before the post goes in.
Wedge anchors are useful if you build a structure that needs a little more support or think you will need to replace the posts more often (but don’t want to tear the concrete out of the ground). You might look into wedge anchors for any posts holding more weight than others, but usually, they’re not necessary for any quick post setting.
Final Thoughts
If you want to set a post without all the hassle of mixing concrete, then the quick-dry concrete method is the best. Simply place your post, pour the concrete and the water, and let it set! If you make sure that your holes are the right size and follow the concrete mix’s instructions, you should be able to set your posts quickly and permanently!


