Installing concrete edging is a great way to put a divider between your garden and your lawn, and if it’s done well it can look fantastic.
If you want to see an instruction video of the process you can find a great one after this step-by-step guide.
Here’s the best way to get it done without ever calling a contractor.
Table of Contents
1. Decide How the Edge Should Look and Make a Plan
Like with any concrete project, a plan is one of the most valuable things you can have when starting.
Just knowing where you want to go with a project can eliminate some of the most difficult challenges that come with the work.
The most important parts of this plan will be:
- The shape of the edge
- The amount of concrete you need
- The amount of wood you’ll need for the form
- The size of the edge
- What tools you need
Knowing these things will be an enormous help when you actually start work.
2. Dig a 4 inches deep Trench
By digging a small trench to serve as a base for your curb, you can ensure that it will both last for a long time and serve its purpose in preventing the different plants or ground materials from mixing together.
First, you’ll want to paint the outline of your trench exactly where you want it in the yard. How wide it is will depend on how wide you want the edge to be in the end.
As a rule of thumb, the trench should be about one inch wider than the finished curb will be.
Generally, your edging probably shouldn’t be less than 4 inches wide though.
As for depth, your trench should be a uniform 4 inches throughout. Make sure to save the dirt that you excavate here for later.
3. Make a Wooden Concrete Form in the Correct Size
Before you start putting your concrete form together, it’s a good idea to make it concrete proof using one of the various methods to make it less likely to stick. This is important, cause when the edge has cured you’ll probably want to take the form off.
There are a couple of good ways to do this. Treating the side that will be facing the concrete with any kind of oil will do the trick just fine usually. Just apply the oil and wait for 15 to 20 minutes for it all to soak in.
You can also soak all the planks you plan to use in water for 24 hours before you use them. This method is cheap, but it requires quite a bit of planning and you may not ever use the wood from this frame again.
Read more: How to Keep Concrete from Sticking to Forms
When the form is properly concrete-proof, it should be easy enough to put together. You can use wooden stakes to keep it anchored to the ground.
The height of your frame will determine the end height of your edge, so make sure that it’s at least a little bit taller than the trench that you already dug.
With your concrete form finished, you just need to make sure that it’s level. Take a spirit level and check a couple of spots along the bottom of your trench, checking it both longwise and widthwise.
Then, using your dug up dirt, make sure that the bottom trench floor is mostly flat.
This is important because it will help your concrete to set more evenly, which should also make it both stronger and more stable.
4. Add a Layer of Gravel to the Bottom of the Trench
This step is surprisingly important. The layer of gravel does several things: First, it makes the concrete that sits on top of it significantly stronger. Second, it fills space, meaning that you won’t need as much expensive, heavy concrete.
Finally, it tells shallow-rooted plants that there isn’t anything for them in the soil underneath the concrete, which will protect it from potentially dangerous plant roots, which will go a long way towards the longevity of your concrete.

The process is simple enough. Pour a half inch layer of gravel all along the bottom of the trench inside of the form. Then tamp it down to the best of your abilities. Check to make sure that it’s mostly level.
You can also use sand for this step instead of gravel, and if you’re feeling fancy you can add a wire mesh between the soil and whatever filling you decide to use. This will also serve to increase the strength and longevity of your concrete.
5. Mix the Concrete and Pour It Into the Form
This is my least favorite part of any project, but it’s all simple enough.
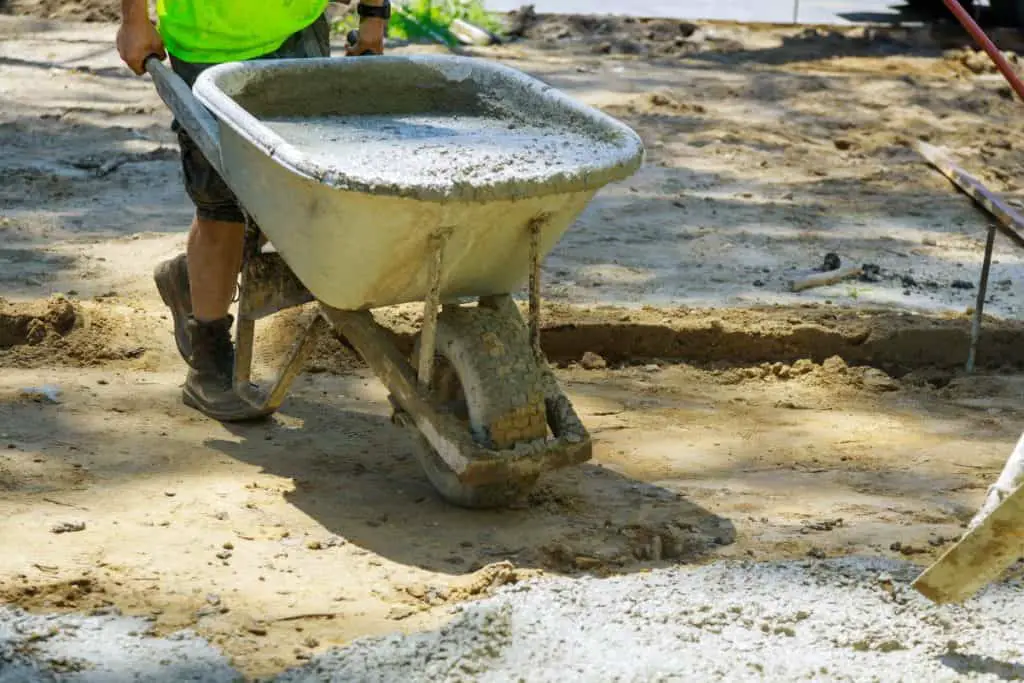
Before anything else, you’ll need to mix your concrete. If you don’t plan on using more than a few hundred pounds of concrete, you might be able to mix it on your own in a wheelbarrow. Otherwise, a concrete mixer is a necessity.
Read more: How to Mix Large Quantities of Concrete (On the cheap!)
Either way, you’ll need protective equipment to keep yourself safe. Concrete is full of cement, which is a highly caustic substance. Even when it’s wet it can still potentially cause chemical burns to exposed skin.
Long rubber gloves, masks, and goggles are required along with thick boots and long sleeves and pants. Whatever the weather, you’ll want to be safe over comfortable.
If you’re mixing by hand, it can sometimes be hard to tell whether you’ve added enough water or not. A clever trick you can do to check is to take an old cup and use it to scoop a bit of concrete out of the mixture.
You can then dump that concrete back on top of the pile as if you were building a sandcastle. If the mixture holds its shape, it needs more water.
If it slumps to about half of the total height of the glass, you’re golden. If it melts any further than that, you need more cement.
Read more: What Happens When Concrete Is Too Wet?
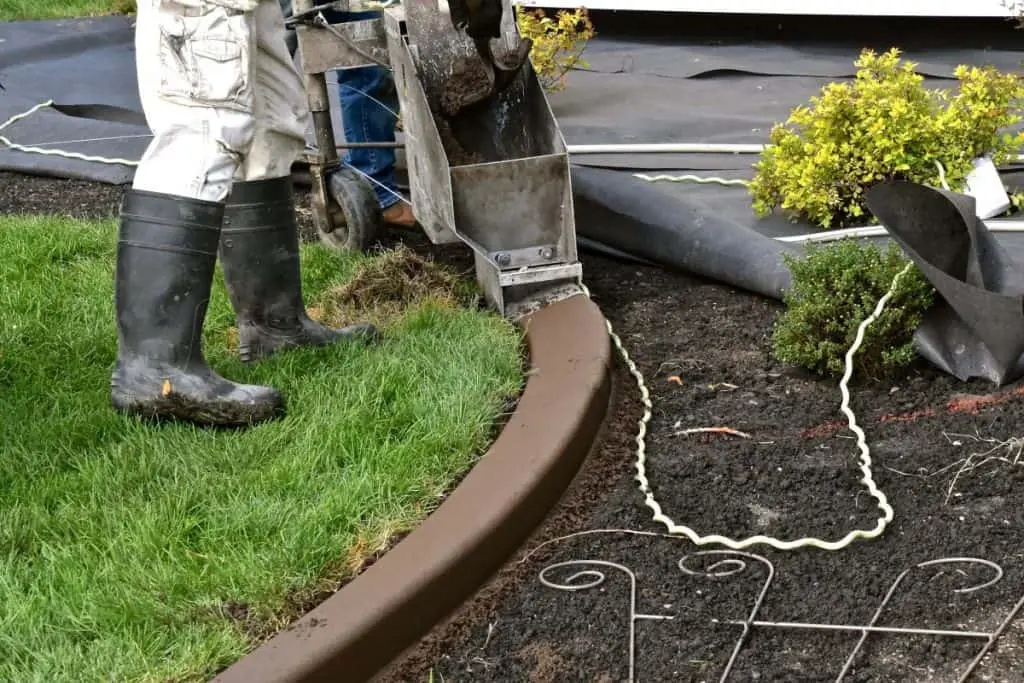
When you have the right mixture, just pour it right into the form. At this point you can do a little bit of preliminary smoothing, just to make sure there isn’t more concrete than what can fit in the form.
Now it’s time for a break. Wash off your tools and wait for the concrete to dry a little bit.
You’ll be able to tell that it’s dry enough to start smoothing when there isn’t any water on the surface, but it’s still a little malleable to your float.
Don’t go too crazy with finishing though. Over-smoothing can cause a lot of damage to your project over time.
Now is also a good time to put a few joints into the curb to help prevent cracking. All you need to do for this is to measure out some even intervals that look nice and make small lined cuts widthwise down the concrete.
Concrete joints are useful because they act kind of like lightning rods for cracks and other damage. They also break up the shape of your curb, which can help it look a little bit nicer.
6. Let the Concrete Cure for Three Days
This step may seem easy, but don’t let it fool you. You need to take at least a small part in this process.
Concrete needs water to cure properly, so you have two choices: Keep the surface constantly wet, or seal it with a chemical sealant as soon as it’s dry enough to hold weight. Either way, you need to do something to make this happen correctly.
Fortunately, for garden edging there probably isn’t that much area that you need to keep wet anyway. Just make sure that if you don’t seal it, you come out and spray water on it once every couple of hours.
Curing can also be adversely affected by cold weather. When the ambient temperature drops below 50 Fahrenheit, concrete will stop curing.
The good news is that you can just wait for the temperature to go back up and it should be fine. The bad news is that until the temperature is back to normal your edging won’t be cured at all.
While you’re waiting for it to cure, pay attention to the weather and don’t count any time it spends under 50 degrees towards it being finished.
7. Remove the Concrete Forms
After the concrete has cured for three days, you should be good to remove the concrete forms. Take them off carefully and you’ll be able to see your beautiful new curb!
If you didn’t take my advice earlier and your concrete has stuck to the form, you may need to put some extra effort into this step.
At this point, your curb is likely to be damaged anyways, so you may just need to try using a crowbar or a hammer to get them to separate.
However, if you treated your wood the way I told you to, you shouldn’t have this problem.
8. Fill In The Trench With Soil
Now that you have that curb all finished, you’ll probably notice that it didn’t fill up your trench all the way. Fortunately, we saved the dirt from the trench all the way back in step two.
Just fill in the space between the curb and the wall of the trench with dirt and you should be good to go.
Now that your curb is finished, you can think about decorating it. You probably won’t want to use acid stain, since that can wreak havoc on your soil.
Instead, think about using concrete paint or even just finishing up the project with a nice sealer. It’s your garden, you can do whatever you want.
Here is a great video showing you every step of the process of installing concrete edging: