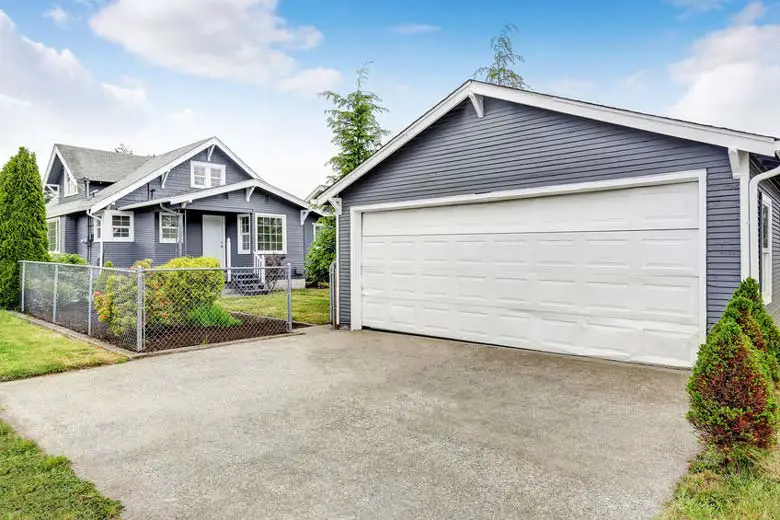
A reason why many people choose concrete as their driveway surface material is that it has high durability. However, even concrete will eventually show wear and tear signs, thanks to exposure to the elements and high foot and vehicle traffic. Instead of stripping it and starting all over, it can be easier and cheaper to resurface your driveway to make it look all new again.
To resurface your concrete driveway yourself, make sure the outdoor temperature is at least 50°F, remove dirt and debris with a pressure washer, fill in the cracks, apply a cooling spray, and mix the resurfacer in a five-gallon bucket. Then, spread it onto the surface and let it cure for 8+ hours.
This article will discuss how to resurface your concrete driveway yourself in seven easy steps, the benefits of resurfacing your driveway versus replacing it, and when to resurface your driveway and when not to.
You’ll also learn what concrete resurfacer is, which kind of equipment and materials you need, everything you need to know about coloring agents, and how long you can expect your resurfacing efforts to last.
| Overview | |
| Working Time | Eight hours |
| Total Time | 48 hours |
| Estimated Costs | $450 – $600 |
| Skill Level | Intermediate |
| Yield | 200 square feet (18.58 square meters) |
Table of Contents
Benefits of Resurfacing Your Driveway Versus Replacing It
After all the elements your driveway is exposed to and being walked and driven on countless times, even a highly durable material such as concrete will start to wear down. The first thing that comes to mind is perhaps to call a professional to get it replaced (depending on how bad it is).
However, resurfacing it (yourself) has some benefits you should consider first.
Resurfacing Is Easier and Quicker
Resurfacing your existing concrete driveway is a lot easier than replacing it altogether. If you strip the old concrete away, you will have to demolish and remove it and then replace it. But if you choose to resurface it (if this is possible, of course), the process is a lot less lengthy.
Read more: Driveway Installation: Is it DIY-able? Will you regret it?
Resurfacing your driveway is, in fact, so ‘easy’ that you can do it yourself, even if you are not the super handy type. From start to finish, the whole process takes no longer than 48 hours. This doesn’t include the preparations, although these won’t take you more than a few hours either.
If you rather let someone professional do the resurfacing of your driveway, you can read more about the costs in this article: Fixing Cracks in the Driveway: A Cost Breakdown.
Resurfacing Is Cheaper
While resurfacing your driveway is something you can still do yourself, replacing the driveway is something that requires a professional. That means you have to pay for labor costs, and since the entire process is more lengthy and strenuous, it will take longer and cost more money. Not to mention, during this time, you won’t be able to use your driveway.
Read more: The Real Cost of Installing a Driveway
Other Benefits
Aside from the costs and relative simplicity, there are a few other benefits of resurfacing to consider, such as:
- It will enhance the appearance of your driveway: the new layer will give your driveway a brand-new look.
- It will extend the lifespan of your driveway: if you let it deteriorate, it will need complete replacement sooner than you’ll like. Read our article on w
- It will reduce concerns for patching: when small cracks show up, you can quickly fill them with a small amount of filler.
Why Resurfacing Is (Relatively) Easy
Resurfacing your driveway might seem to be a challenging task, but it is actually relatively easy, and most people could do it themselves. Make sure to:
- Prepare everything properly
- Carefully apply the resurfacer according to the manufacturer’s instructions (and me)
- Give the resurfacer enough time to cure
In that case, you will end up with a lovely sparkly new driveway.
What you might be wondering is how complex the application process will be. Well, it is pretty straightforward. You mix the resurfacer with water and spread this mixture out over your concrete driveway in sections (not all at once). That is pretty much it.
A benefit that resurfacers have is that they are self-leveling, creating a level surface on their own with no extra effort from your side.
Resurfacer spreads and pours easily (it will come out as a syrup-like consistency if you mix it well with the right amount of water) and the only thing you will really have to do is make sure to spread it evenly on the driveway.
In addition, concrete resurfacing products are available at nearly any home improvement or hardware store.
When To Resurfacing Your Driveway and When To Replace It
Before you start the resurfacing process, it is essential to determine if you can still resurface your driveway or if a total replacement is necessary. You want to avoid dangerous situations (for example, when the concrete surface is too unstable) or any wasted time, effort, and money.
When Resurfacing Is Possible
The surface of your concrete driveway must still be in relatively good shape to resurface. It can be cosmetically marred or damaged but resurfacing won’t correct deep cracking or heaving.
Resurfacer can cover over regular flaking of a concrete surface or small cavities due to spalling. If you’re dealing with damage from road salts, for example, your concrete driveway can be resurfaced quite easily with a simple coating.
Here are a few examples of when resurfacing is possible:
- Superficial cracking
- Discoloring
- Minor Chipping
- Spalling
- Cosmetical damage
When Resurfacing Is Not Possible
Replacing your driveway is something that most people prefer to avoid as long as they can if the circumstances allow it. It can be expensive, but replacing it is sometimes the only solution.
So, when is this the only solution? Well, as I mentioned previously, resurfacing is not suited when deep cracking or heaving has to be corrected. When your concrete surface is too unstable or badly damaged, resurfacing is, unfortunately, impossible.
If the surface of your driveway shows deep cracks that cause the driveway to become unstable, there is no safer option than to replace the entire thing.
You can read further along in this article what you could do next time to prevent replacing your concrete driveway for as long as possible.
Concrete Resurfacer
As must be clear by now: An easy way to give your driveway a second life is to use a concrete resurfacer! Now, let’s discuss everything you need to know about resurfacer and which kind you’ll need for this driveway project.
What Is a Concrete Resurfacer?
First things first: Let’s see what concrete resurfacer actually is. According to Jeff Beneke from The Spruce: “Concrete resurfacer is a special cementitious product that blends ordinary Portland cement, fine sands, polymer modifiers, and other additives aimed at providing adhesion. Unlike other cement products, it is designed to be applied in very thin coats (no more than 1/2 inch (1.27 cm) thick), and its additives provide good adhesion to an existing slab.”
He continues: “Concrete resurfacer is a very strong product, rated for compressive strength of about 4,500 psi. This is actually stronger than the slab itself, so properly applied, resurfacing layers can be very durable.”
Which Concrete Resurfacer Should You Choose?
Because there are so many concrete mix products available, it can be hard to choose between them all. One essential aspect in selecting your resurfacer is to pick one designed for the purpose you are using it for, in this case, to resurface your concrete driveway fully.
We are speaking of a ‘concrete slab,’ for which the following products are suitable:
- Sakrete Flo-Coat Concrete Resurfacer
- Quikrete Concrete Resurfacer
- Quikrete Re-Cap Resurfacer
Keep your eye out for products labeled as “concrete resurfacer” instead of “floor leveler.” If you are faced with the choice between consumer-grade or commercial-grade products, go for the commercial-grade one(s) since these are more durable.
Why You Should Not Use Regular Mortar Mix
Unfortunately, resurfacer isn’t the cheapest product, and that is why some homeowners decide to purchase ordinary mortar mix instead. While it has a similar consistency as resurfacer and is much less costly, it does not work for too long.
Read more: Concrete vs Mortar: What’s the difference, and which is better?
The reason is simple: it lacks the additives and bonding agents that make the resurfacer adhere to the slab, which is an essential factor in your driveway’s resurfacing to be more durable.
Always invest in an actual concrete resurfacer when you decide to renew your slab; otherwise, you will be going through this entire process all over again in no-time.
How to Resurface a Concrete Driveway (Step by Step)
1. Gather a Pressure Washer, Drill, & Bucket
Aside from the resurfacer, you’ll need some other equipment and materials to get that brand new driveway look. Here is a complete list of everything you will need.
Equipment:
- Power/pressure washer (if you don’t have one, you could rent or borrow one)
- Garden hose
- 1/2-inch (1.27 cm) drill and mixing paddle
- Long-handled squeegee
- Concrete edger
- Broom
- 5-gallon (18.93-liter) plastic bucket
- Measuring pail
- Safety glasses
- Gloves
Materials:
- (Approximately) Twenty bags of dry concrete resurfacer (how much you need depends on your driveway size)
Usually, concrete resurfacer comes in a dry mix 40-pound (18.14-kg) bag or 50-pound (22.68-kg) pails. Be mindful that you will have to apply two or sometimes three resurfacing layers to finish the job. One bag will cover 15 to 90 square feet (1.39 to 8.36 square meters), typically. So, if you have a large driveway, you will most likely purchase several bags.
Costs
You will need several 40-pound (18.14-kg) bags of resurfacer, which sell for about $25 to $55 a bag. If you’re buying pails, you can count on closer to $70 per 50-pound (22.68-kg) pail.
Resurfacing is not cheap. However, it is still cheaper than removing the old slab and pouring a brand new one. As I also stated earlier, do not go for the cheaper mortar mix since this is not durable and won’t fit your driveway’s resurfacing.
Additionally, it will also save you a lot of money if you do it yourself since you don’t have to pay professional contractors’ labor fees. Overall, prepare to spend $450 to $600.
2. Buy Gray Coloring Agents to Match the Slab
Gray is the only color that resurfacers are available in. However, you can use a coloring agent made explicitly for concrete products to offer a different color.
Remember that if you are only resurfacing a larger slab section, it is not always easy to match colors. Old concrete looks different from new concrete, so if you want to create one cohesive look, it’s best to resurface all of it.
3. Choose a Day That’s 50°F or Warmer
This step’s title already says so: Check the weather before you start this entire process! Although this might not be a fun winter type of home improvement activity, it is still important to note that the temperature must remain above 50°F (10°C) for at least eight hours and above freezing temperatures for at least 24 hours.
Make sure there is no rain forecasted for at least eight hours after application as well. If it does happen to rain, cover the slab with plastic immediately. When the sun is out, mix the resurfacer in a shaded area and leave it there while you’re applying it on your driveway. Ideally, work when the sun’s glare is at a minimum.
Another thing to keep in mind when it comes to the weather: If it is 90°F (32.22°C) or up, you will have to work faster since the resurfacer mix will harden quicker. After the mixture has been applied all over the driveway, keep it moist intermittently (I will explain more about this later on in the article).
4. Use a Pressure Washer to Remove Debris
The first step is to make sure your driveway is clear of any objects or loose debris. Eliminate any dirt, oil, paint, tree sap, or flaking concrete with a pressure washer. A high-powered pressure washer is best for removing dirt, but if you don’t have one, use a garden hose and a long-handled scrub brush instead.
Read more: How To Clean a Concrete Driveway Without a Pressure Washer
If cleaning the driveway this way doesn’t remove all the stains, consider applying a sealer before moving on to resurfacing. That’s because you want to prevent the stain from bleeding through the resurfacing layer (which will most likely happen if you don’t seal it).
Another essential part of your preparations before the resurfacer is applied is protecting the expansion joints. You can tape them off with control joints or weather stripping to prevent any resurfacer from getting in.
5. Fill Any Remaining Cracks (& Let It Dry)
What you need to do next depends on the (minor) issue(s) at hand. If you have some cracks in the concrete, apply the necessary product to fill these up. Make sure to let this product dry completely before you proceed with the resurfacing.
Read our buyer’s guide to find the best concrete crack fillers for driveways.
As previously mentioned, you only need to resurface your driveway when you’re looking for cosmetic improvements. When you have more serious concrete problems, you should remove the entire current slab and redo it since resurfacing will only mask the issues for a short amount of time.
This doesn’t mean that there can’t be any minor damages (why else resurface it, right?), so now is the time in the process first to tackle those minor damages.
6. Mix the Resurfacer With Water in a Bucket
Before you continue to mix the resurfacer, apply a cooling spray to your driveway with your garden hose. After this, sweep off any residual water while keeping the driveway moist. This part is important because the resurfacer should be reapplied to a moist surface so the concrete won’t draw any moisture out of the newly applied resurfacer.
Now, on to the mixing of the resurfacer!
In order to get the best results, mix one bag of resurfacer at a time. Six pints of water are usually sufficient for one 40-pound (18.14-kg) bag.
If the temperature outside is a little cooler, use warm water and use cold water in warmer weather.
Let’s take 73°F (22.78°C) as an example. With this temperature, you have about 20 minutes before the resurfacer hardens.
Take the six pints of water and pour it into a clean 5-gallon (18.93-liter) plastic bucket. After that, empty the resurfacer bag into the bucket and continue to mix the two for several minutes into a smooth, pourable consistency. Let it sit for a few minutes, and then mix the two again.
You want to achieve a creamy, pourable mix that has the texture of syrup. If that means you have to add a little extra water, you should do so.
What can sometimes occur when mixing the resurfacer by hand is that lumps appear. If that is the case, you can grab the power drill (with a paddle mixer attachment instead of a barrel-type attachment) and mix the resurfacer and the water until there aren’t any more lumps and the consistency is syrup-like.
Optional: If you want to use any coloring agents, you should add them at this stage. The coloring agents can be added to the mix of resurfacer and water. Just make sure that the coloring agents are compatible with the resurfacer. Choosing coloring agents from the same manufacturer as the resurfacer is the best idea.
7. Apply the Resurfacer With a Trowel or Squeegee
Time to apply the resurfacer!
Grab the long-handled squeegee or trowel and/or brush. Work in sections of no more than 144 square feet (13.38 square meters) at a time, if possible. Also, work a way where you go from the edges of control to expansion joints with each application.
The easiest way to apply the concrete resurfacer is to pour a small amount on the surface (as I said: no more than 144 square feet (13.38 square meters) at a time) and then start immediately spreading it evenly with the (light) long-handled squeegee. However, a trowel or brush is an option if you don’t have a squeegee.
You can create professional-looking edges if you use a concrete edge and the edges of the slab if you do it within the first 10 to 15 minutes of applying the resurfacer.
After your whole driveway has been covered with the first layer, let it dry for about two to three hours. If needed, apply the second coat in the same exact way after the first layer is dry. It is not always necessary to apply a second layer; only if the first layer hasn’t hidden all imperfections.
Most manufacturers will recommend applying a second layer, but this isn’t always required. However, sometimes even a third layer is needed; it all depends on the situation.
Reminder: What is the outside temperature like? The hotter it is, the quicker the resurfacer mix dries. If we take the ‘example’ temperature I used earlier (73 degrees Fahrenheit), the resurfacer mix remains workable for 30 minutes. Keeping it in the shade and using cold water will make it usable for a little longer, giving you some more time.
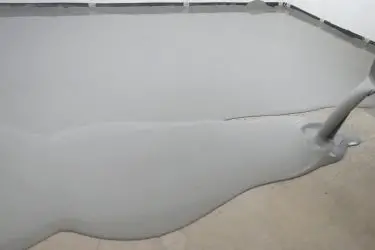
8. Give the Surface Texture With a Broom
If you let the resurfacer cure without any other adjustments, it will become the same smooth texture found in garages. However, a smooth surface can often be slippery when it comes to a driveway, which is not desirable in the rain or snow.
What we will do in this step is give the surface some texture. You can do this by taking a long-handled broom and making full strokes across the surface.
This step takes about five minutes of applying the resurfacer while the mix is still wet enough to make any adjustments. Don’t forget to make the broom strokes in the same direction for a more symmetrical design.
9. Let the Surface Cure For 8-48 Hours
Now it is time to let the resurfacer cure. This means that it will become stronger and harder as it dries, and therefore it’s essential to give it sufficient time before you walk on it or park your several-ton car on it.
You can walk on resurfaced concrete after a minimum of eight hours, and you can drive on it again after 48 hours.
While the resurfacer is curing, keep it slightly moist by misting it with water once or twice a day for the first two days. This step is particularly important if it is hot outside, especially 90 degrees and over. It isn’t necessary to cover the surface with plastic unless it rains during the curing process.
So, that is really all it takes to resurface your driveway! Not as hard as it seems, is it? Now it is time to sit back and enjoy your ‘brand new’ driveway.
Here’s a great video guide from Quickrete on how to resurface concrete, which will let you see how to do it correctly:
How Long Does a Resurfaced Driveway Last?
Now that you have learned nearly all the ins-and-outs of resurfacing your driveway, you might also be curious how long you can expect it to last. If it is done correctly, it can actually last a long time. Somewhere between eight and fifteen years is not uncommon.
However, keep in mind that this is only applicable when there are no underlying issues that were ignored or not adequately dealt with before the resurfacing was applied. This is why it is so important not to take any shortcuts during the resurfacing process.
The best way to ensure a long-term driveway is to repair any minor damage before resurfacing your driveway and resurface it properly.
Causes for Concrete Driveway Damage
In order to prevent it in the future, knowing how concrete driveway damage occurs could be helpful to know as a homeowner. One thing that causes your concrete driveway’s durability to disappear is not knowing that driveways require maintenance in the first place.
Driveways require regular care because they’re exposed to the elements at all times, through summer and in the rain.
Although concrete is a highly durable material, it will deteriorate throughout its lifetime due to its structure. Especially with the combination of rain and the heaviness of vehicles, small cracks will occur over time. But regular care can help a driveway last decades!
Other reasons that might damage concrete driveways:
- Frost heaves
- Sunken concrete
- Thick tree roots that are growing underneath the slab
- Lack of edge support
If you notice any damages or issues on your concrete driveway, it’s best to address them (sooner rather than later). If you don’t, minor issues can become more significant issues, and you might need a brand new driveway instead of resurfacing.
Do you know how to recognize these issues? Well, keep an eye out for crumbling concrete, cracks that are widening, or other noticeable damages. These types of things will eventually lead to the resurfacing or replacement of the driveway if they’re not stopped fast enough.
Final Thoughts
Resurfacing your concrete driveway is a lot easier than it seems, and nearly anyone can do it themselves if the instructions explained in this article and from the manufacturer are followed correctly.
Making sure that the weather is right and the preparations are done adequately is essential. Resurfacing your concrete driveway is cheaper and easier than replacing the driveway if, of course, the circumstances allow for it. However, the best thing you can do is prevent the damage in the first place!